To help staff easily distinguish between paper and paperless electronic prescriptions, an eScript indicator can be added to your dispense labels.
An example of the eScript indicator:

Check Dispensary Label Design
Before you can add the eScript indicator to your dispensing labels, please check which label designs you are currently using.
To check your dispense label designs:
- Go to Z Dispense > Workstation

- In the Printing tab, look for the Script Label and other labels that you use (eg. Additional Directions, Alt labels):

- Note down the label(s) selected and proceed to Z Office to add the eScript indicator to these labels.
Add eScript Indicator to Dispensing Label
- Go to Z Office > Tools > Label Designer > Manage Labels

- Search and select the dispense label you currently use.
Note
By default, the eScript indicator has been added in all the System Dispense Labels (labels indicated with a
 ).
). - Double-click the relevant label to open the Edit Label Details window:

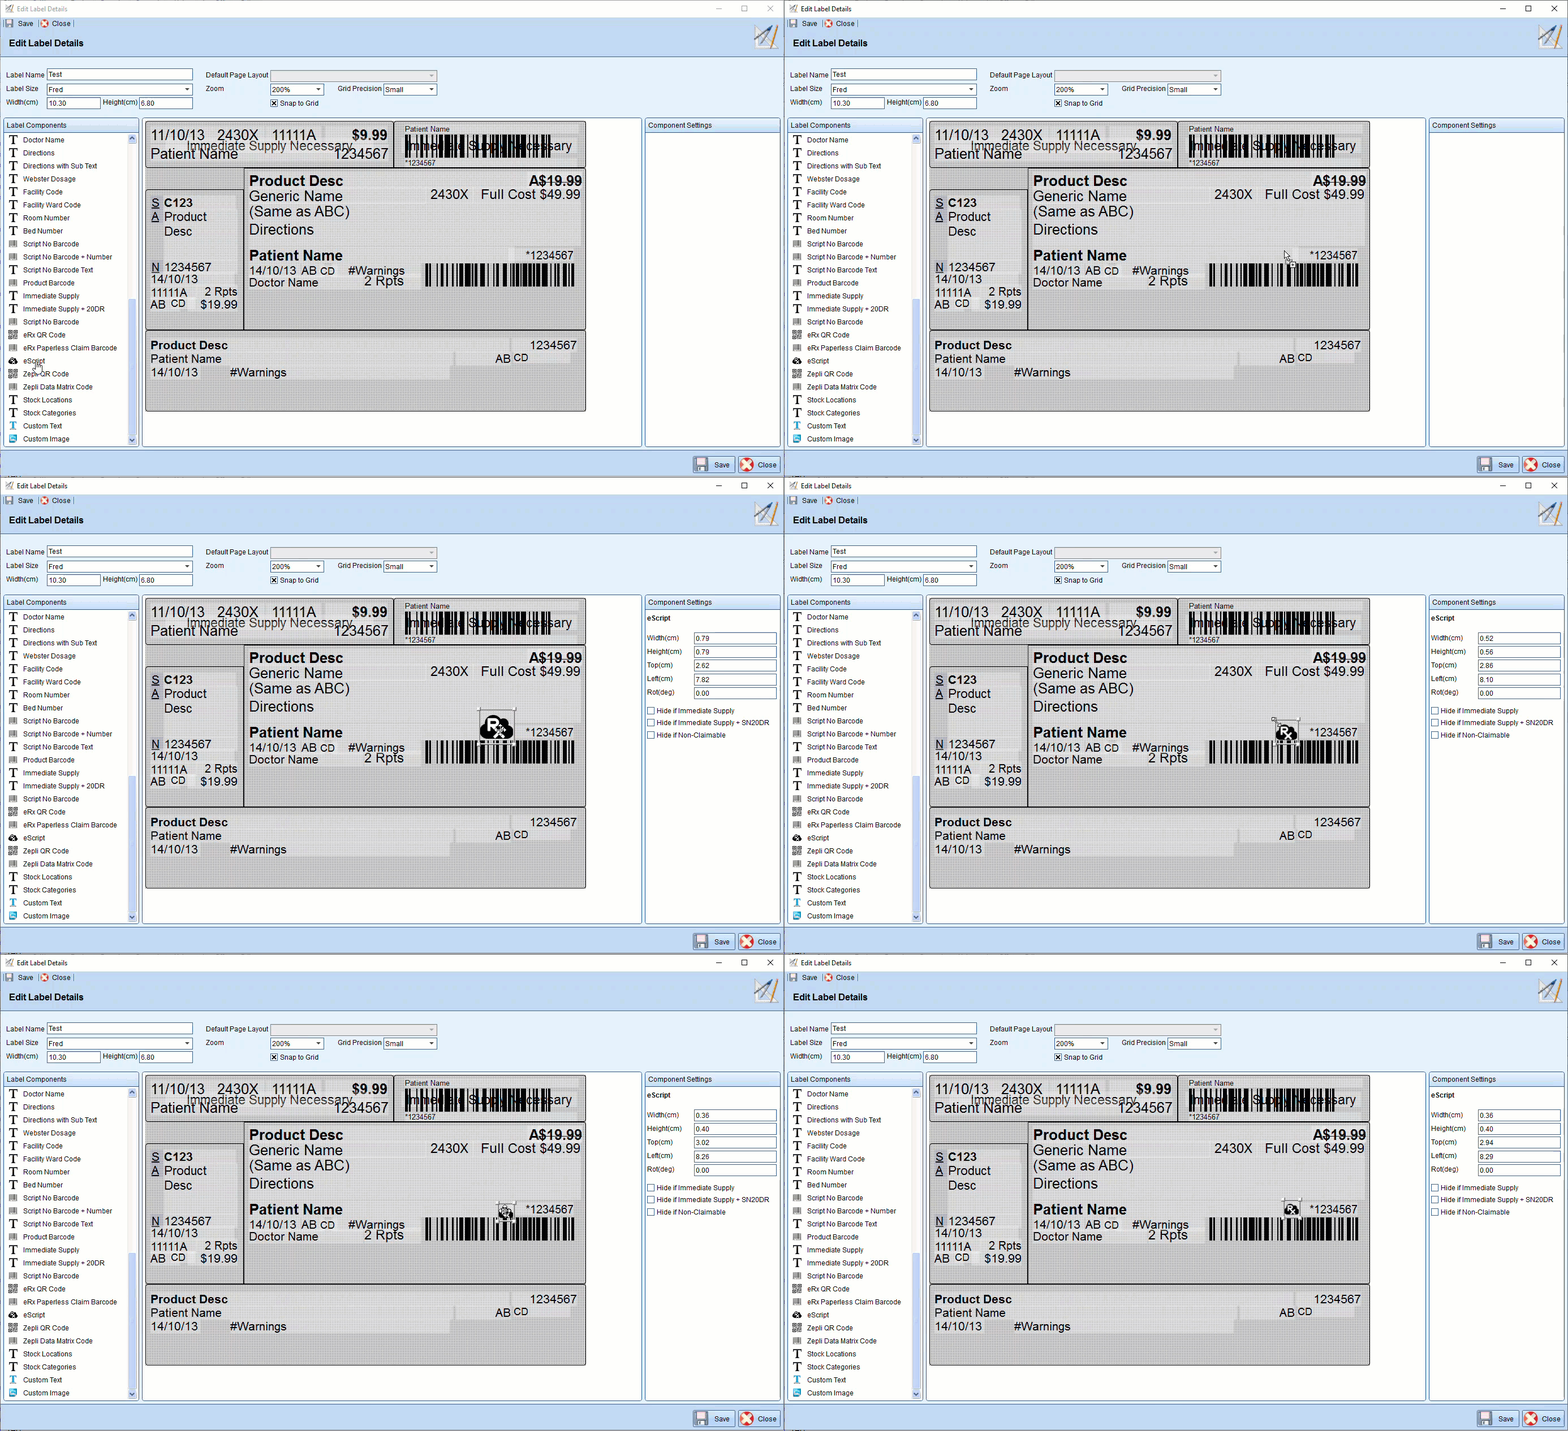
- Under Label Components, scroll down to find the eScript component. Drag and drop the eScript component onto the label:

- Reposition the component by dragging and adjusting the dimensions under Component Settings on the left panel:

Note
You can position the eScript indicator anywhere on the label. This is just an example of a place to put it. - Once you're happy with the position and size of the label, press
 to save the changes.
 - You can repeat Steps 2-5 for your Additional and Alt label designs if needed.
- Restart Z Dispense to reflect the label changes.
Comments
0 comments
Please sign in to leave a comment.