Note
You will need to ensure that your store email account has been setup to be able to send emails to customers.
Individual Statements
- Go to Z Office > Customers > Manage Customers
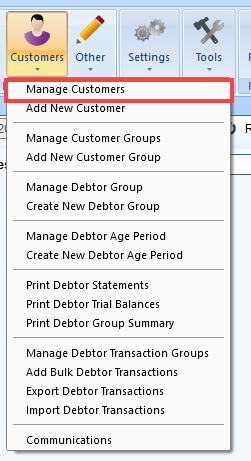
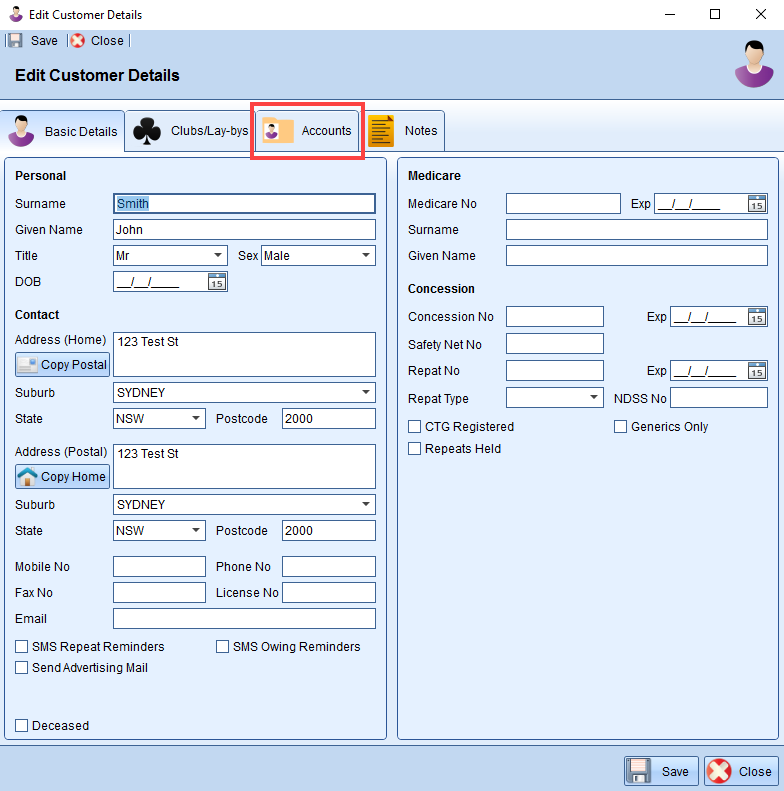
- Search for the customer and select them
- Go to the Accounts tab
- In the Debtor Account Details panel, select the account you wish to print and press on

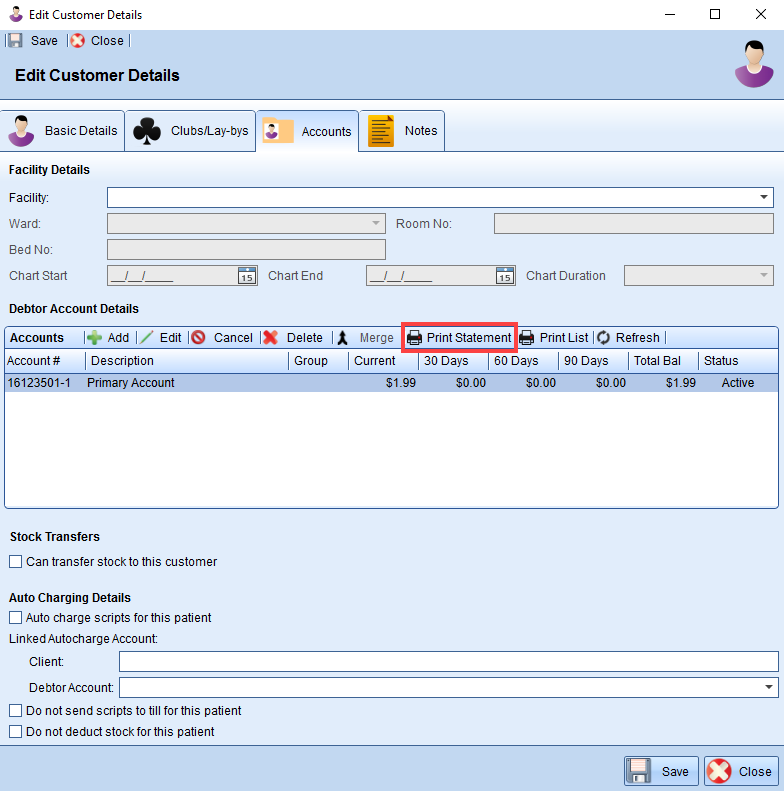
- The Print Debtor Statement window should appear:
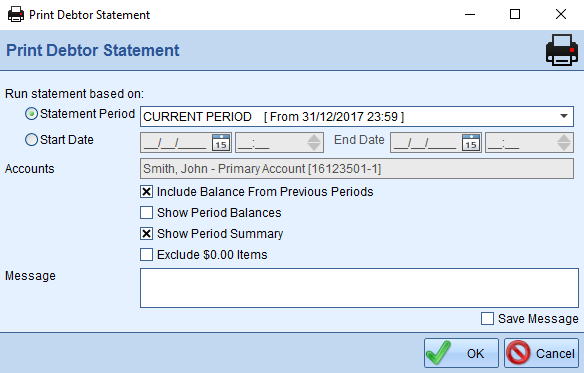
Statement Period - The debtor period of the statements. Z Office should automatically age the debtor periods at the end of each month for you.
State Date - Select this to use instead of the Statement Periods.
Accounts - As we are printing for an individual patient, this will automatically be prefilled in.
i. Include Balance From Previous Periods

Enabling this option will include an additional field in the statement that shows the balance from previous periods.
ii. Show Period Balances

Enabling this option will show the period breakdown for previous periods.
iii. Show Period Summary

Enabling this option with show a period summary/overview
iv. Exclude $0.00 items
Enabling this option will exclude $0.00 items from the statements.
Message

This will print a message on the statement, as shown above.
- Once happy with the printing/statement options, press OK to generate the statement to print
- The Debtor Statement window should appear with a preview of how the statement will look:
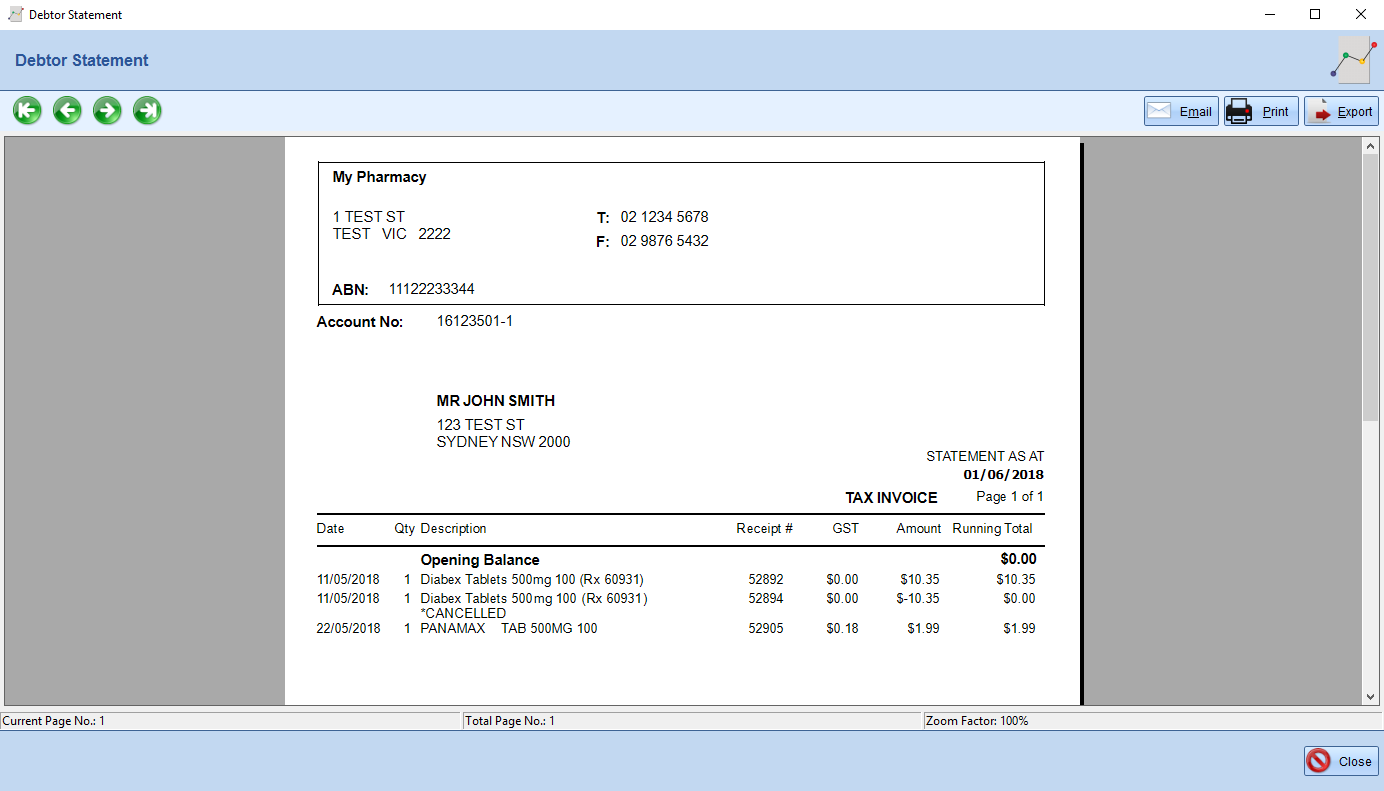
- Press
 or
or  to print/email the statement
Bulk Print Statements
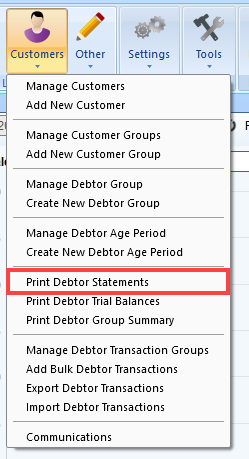
- Go to Z Office > Customers > Print Debtor Statements
- The Print Debtor Statement window should appear:
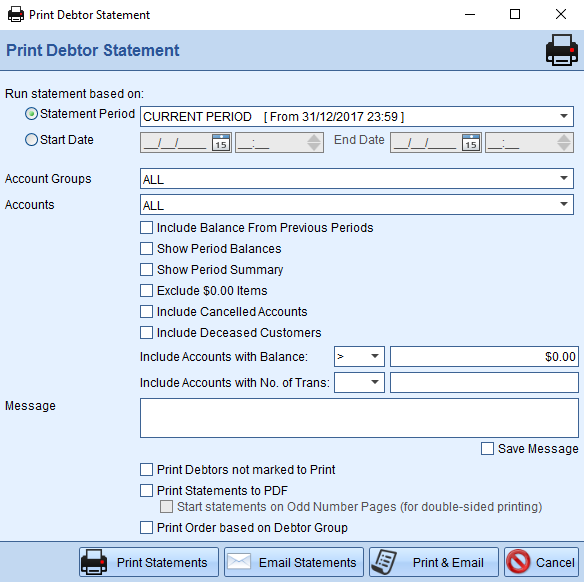
Statement Period - The debtor period of the statements. Z Office should automatically age the debtor periods at the end of each month for you.
State Date - Select this to use instead of the Statement Periods.
Account Groups - Account Groups/Debtor Groups allow you to easily select a particular group only to print their statements.
Accounts - Manually select which accounts to print from.
i. Include Balance From Previous Periods

Enabling this option will include an additional field in the statement that shows the balance from previous periods.
ii. Show Period Balances

Enabling this option will show the period breakdown for previous periods.
iii. Show Period Summary

Enabling this option with show a period summary/overview
iv. Exclude $0.00 items
Enabling this option will exclude $0.00 items from the statements.
v. Include Cancelled Accounts
This will mark cancelled accounts to be included to print.
vi. Include Deceased Customers
This will mark deceased customer's statements to be included to print.
Include Accounts with Balance
There are multiple options where you can filter to print accounts according to their balance.
e.g. Include Accounts with Balance > 0, will only print statements that have a balance greater than $0. Accounts that have a negative value e.g. <$0, won't be printed.
Include Accounts with No. of Trans
There are multiple options where you can filter to print accounts according to the number of transactions.
e.g. Include Accounts with No. of Trans > 0 will only print statements that have had a transaction within that period (i.e. something was charge to their account within that debtor period).
Message

This will print a message on the statement, as shown above.
- Press
 or
or  or
or  to open the Debtor Statement Job Customer List:
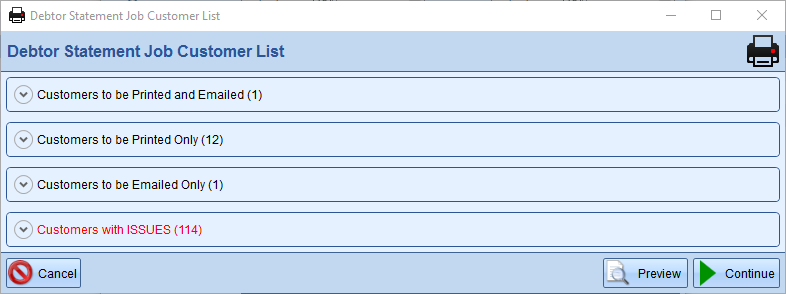
This window will highlight the list of all the statements that have been selected to print and show you if there are any issues with the statement (i.e. if they're not marked to be printed etc).
Clicking on any of the headers with expand the list of customers and accounts:
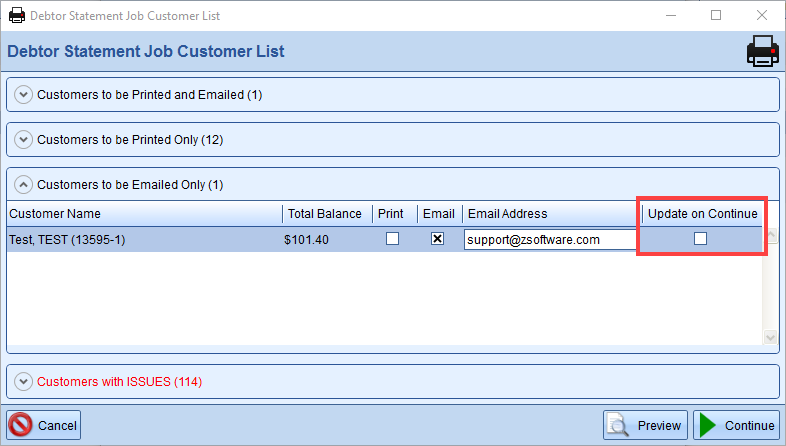
You can easily update customer's account settings to be marked to print/email and add their email address to use as well.
Ticking 'Update on Continue' means that when you press the continue button, Z Office will update the settings for next time.
- Press
 to print/email/print and email statements
Comments
0 comments
Please sign in to leave a comment.