The knowledgebase articles on Z Register will cover the default Register layout (Layout A).
As there are several layout customization options, the buttons/screenshots/functions may look different/not appear depending on your settings.
Modifying the Sales Screen
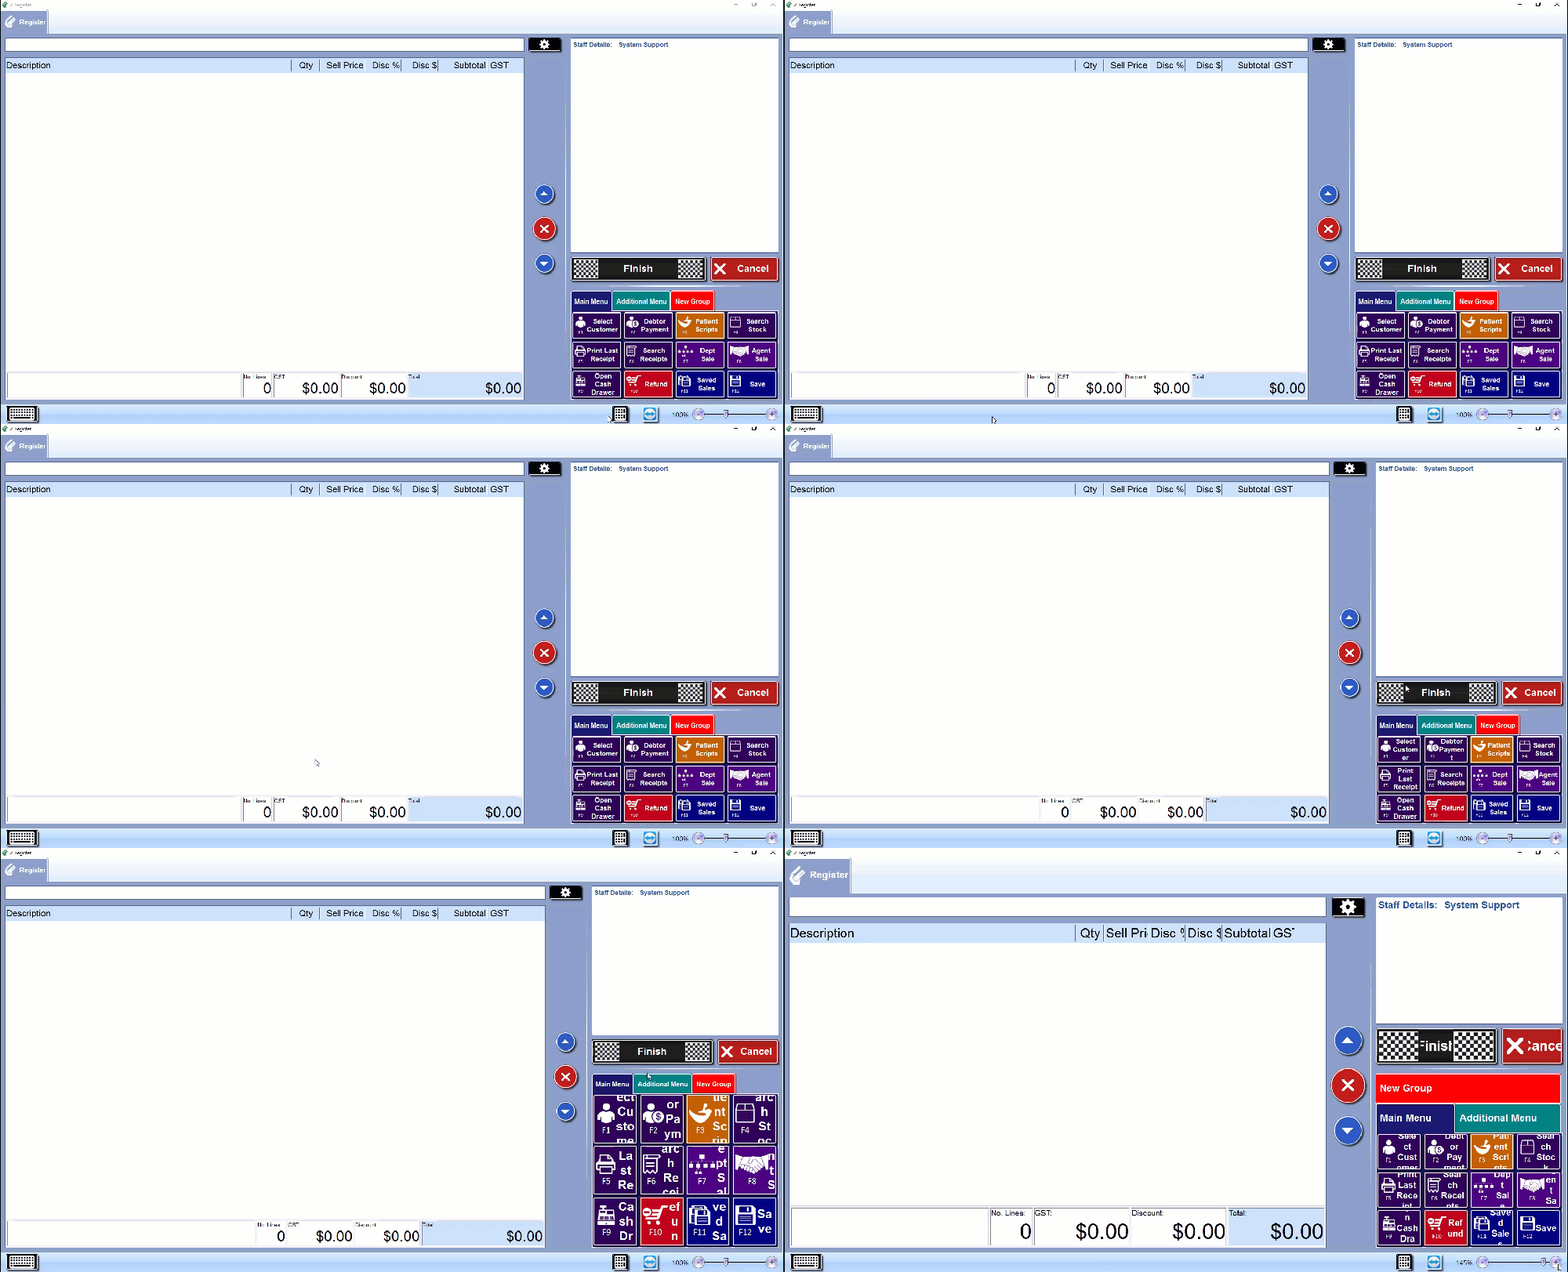
As demonstrated above, there are several options to change the layout of Z Register.
 - The ZoomIT button can control the level of 'Zoom' into the Register screen. You can increase or decrease it accordingly to your resolution/monitor size.
 - Press this to toggle between enabling or disabling the On-Screen Number Pad.
 - Press this to toggle between enabling or disabling the On-Screen Keyboard.
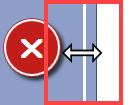 - Press and drag the white line left/right/up/down to change the panel sizing.
Check What Register Layout the Store is Using
You can modify the Register Layout buttons to add/remove buttons and functions.
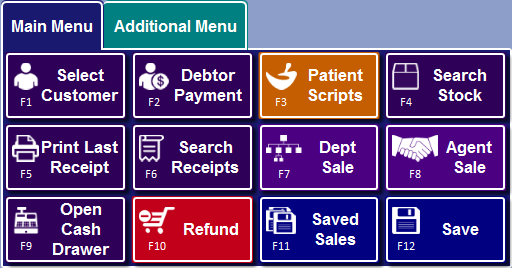
To check what Register Layout you are using or to change which layout you are using:
- Go to Z Register > Settings

- The Login Required prompt should appear:
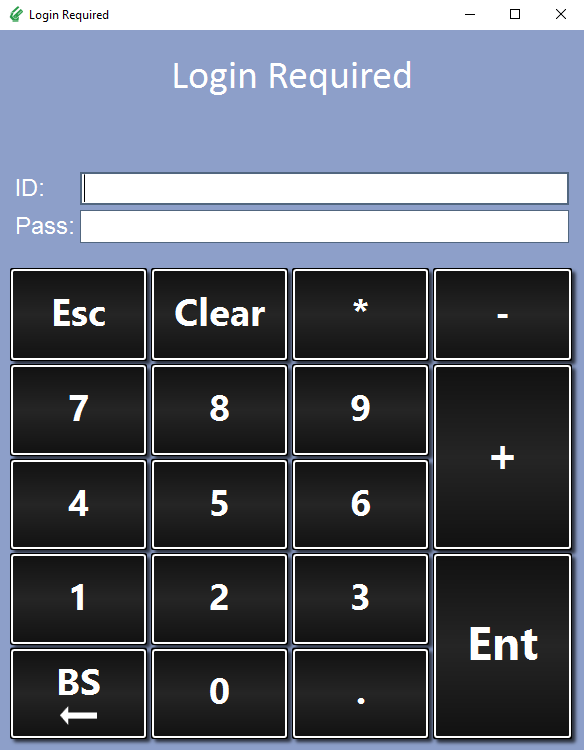
Log in with your Z Register ID and password. - In the General tab > Register, check the Register Layout field:

- Note down the layout as you will need to find this in Z Office to customise the design.
Modify the Register Layout
- Go to Z Office > POS > Manage Register Layouts
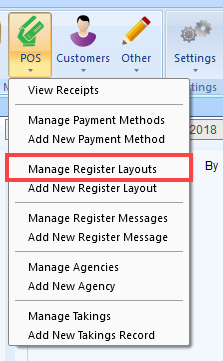
- Select a Register Layout to update.
NoteYou cannot update system default layouts which are indicated with a
 . You can however, use them as a starting point and save the Layout Name as something different.
 - The Edit Register Layout should appear:
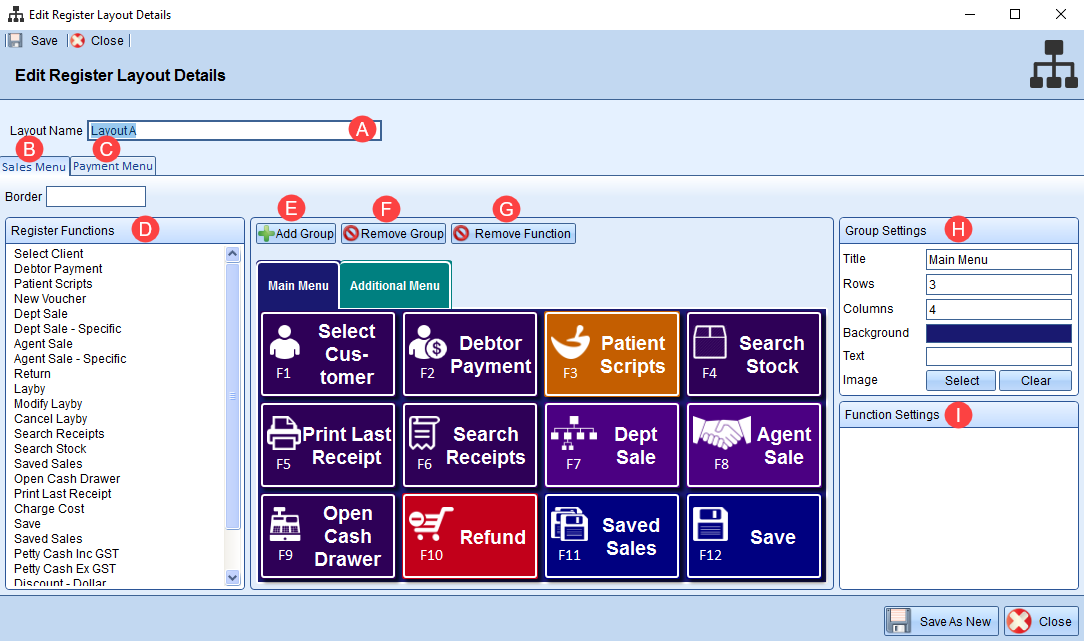
A. Layout Name - The name of the layout
B. Sales Menu Tab - The layout settings for the Sales Menu
C. Payment Menu Tab - The layout settings for the Payment Menu
D. Register Functions - The list of available register functions
E. Add Group - Add a new group/tab to the menu
F. Remove Group - Remove a group/tab
G. Remove Function - Remove a function button from the layout
H. Group Settings - Modify the group settings, in particular the grid (amount of columns and rows)
I. Function Settings - Function settings
Making Space to Add New Button
To add a new button to Z Register, you will need to ensure that your Register Layout has space available to add the new button. There are several ways to make space for a new button by:
Remove an existing button
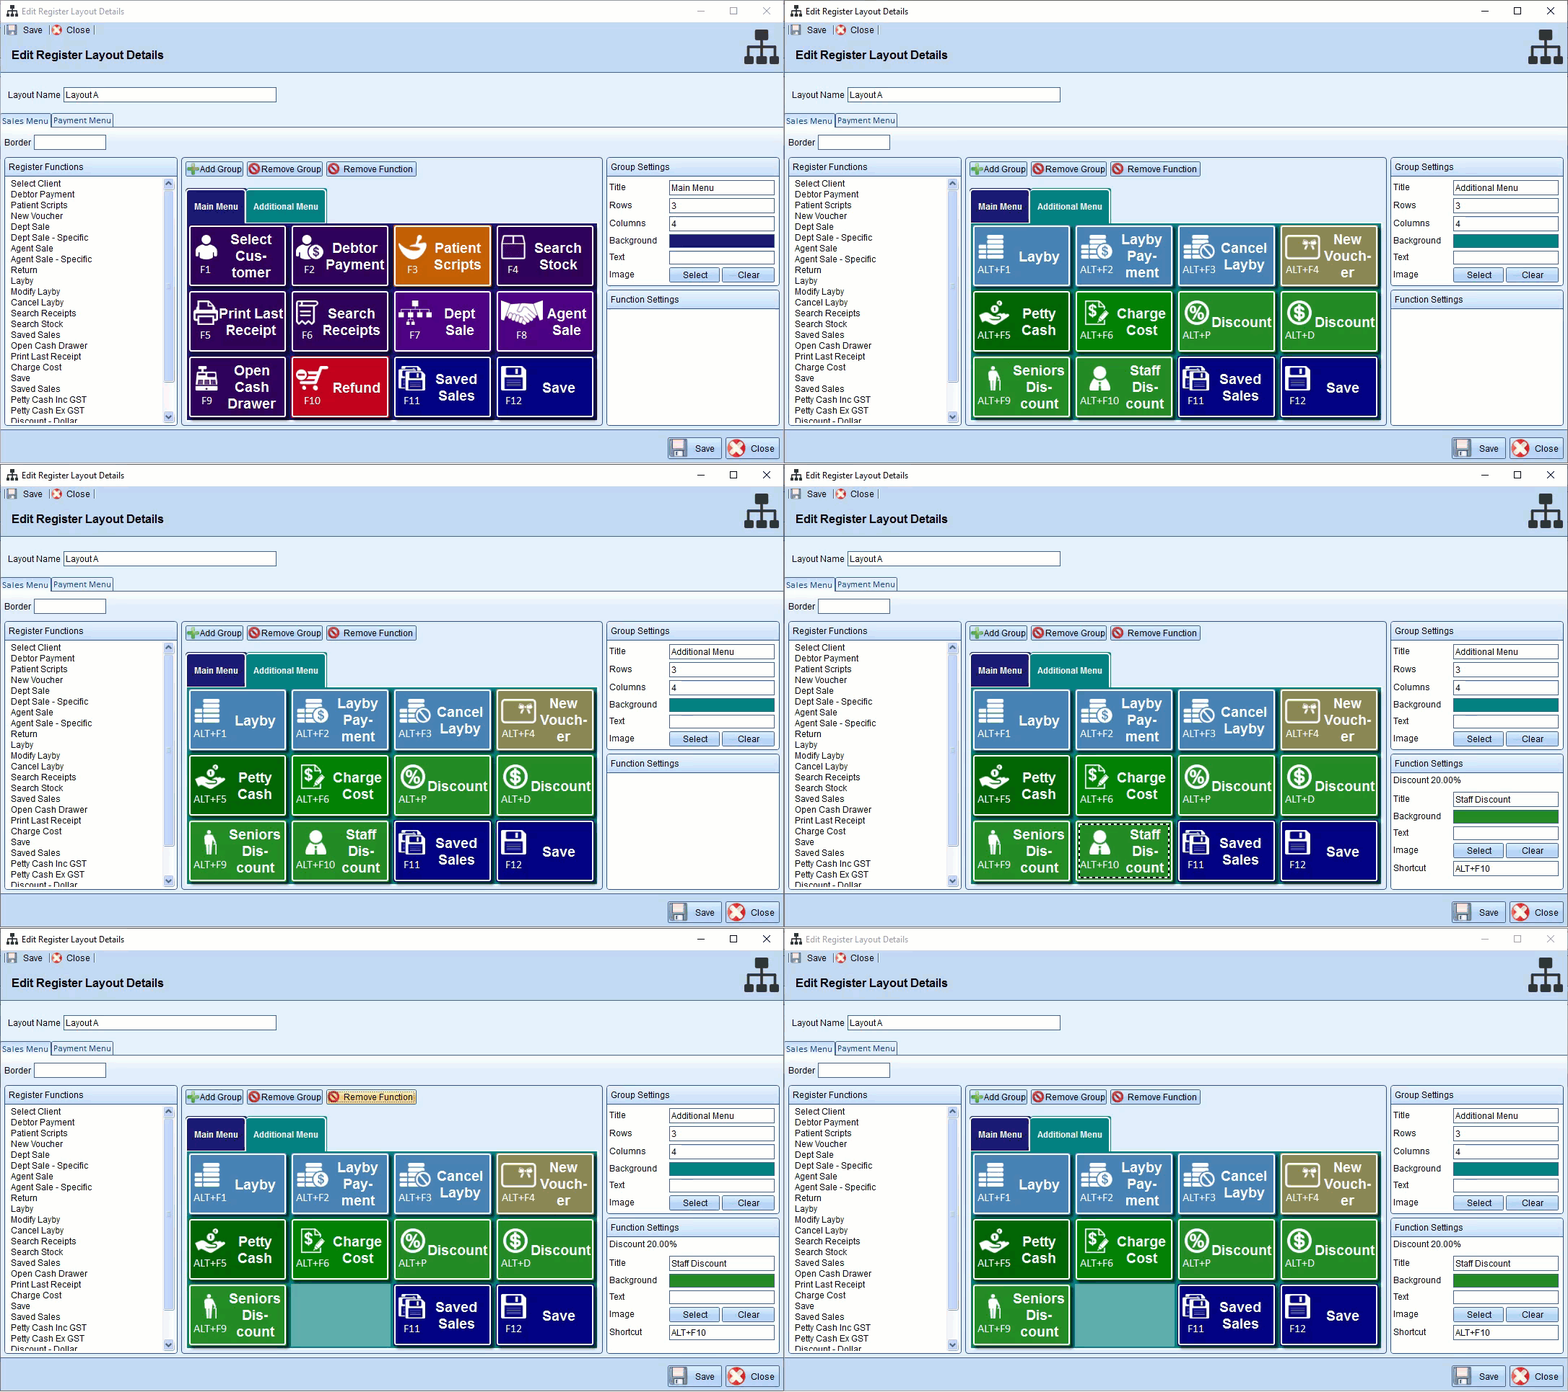
If there is a function/existing button that you don't need on Z Register, you can remove it by selecting the button and pressing the Remove Function button.
In the example below, we'll be removing the Staff Discount Button:
Modifying the Amount of Rows/Columns of the Group
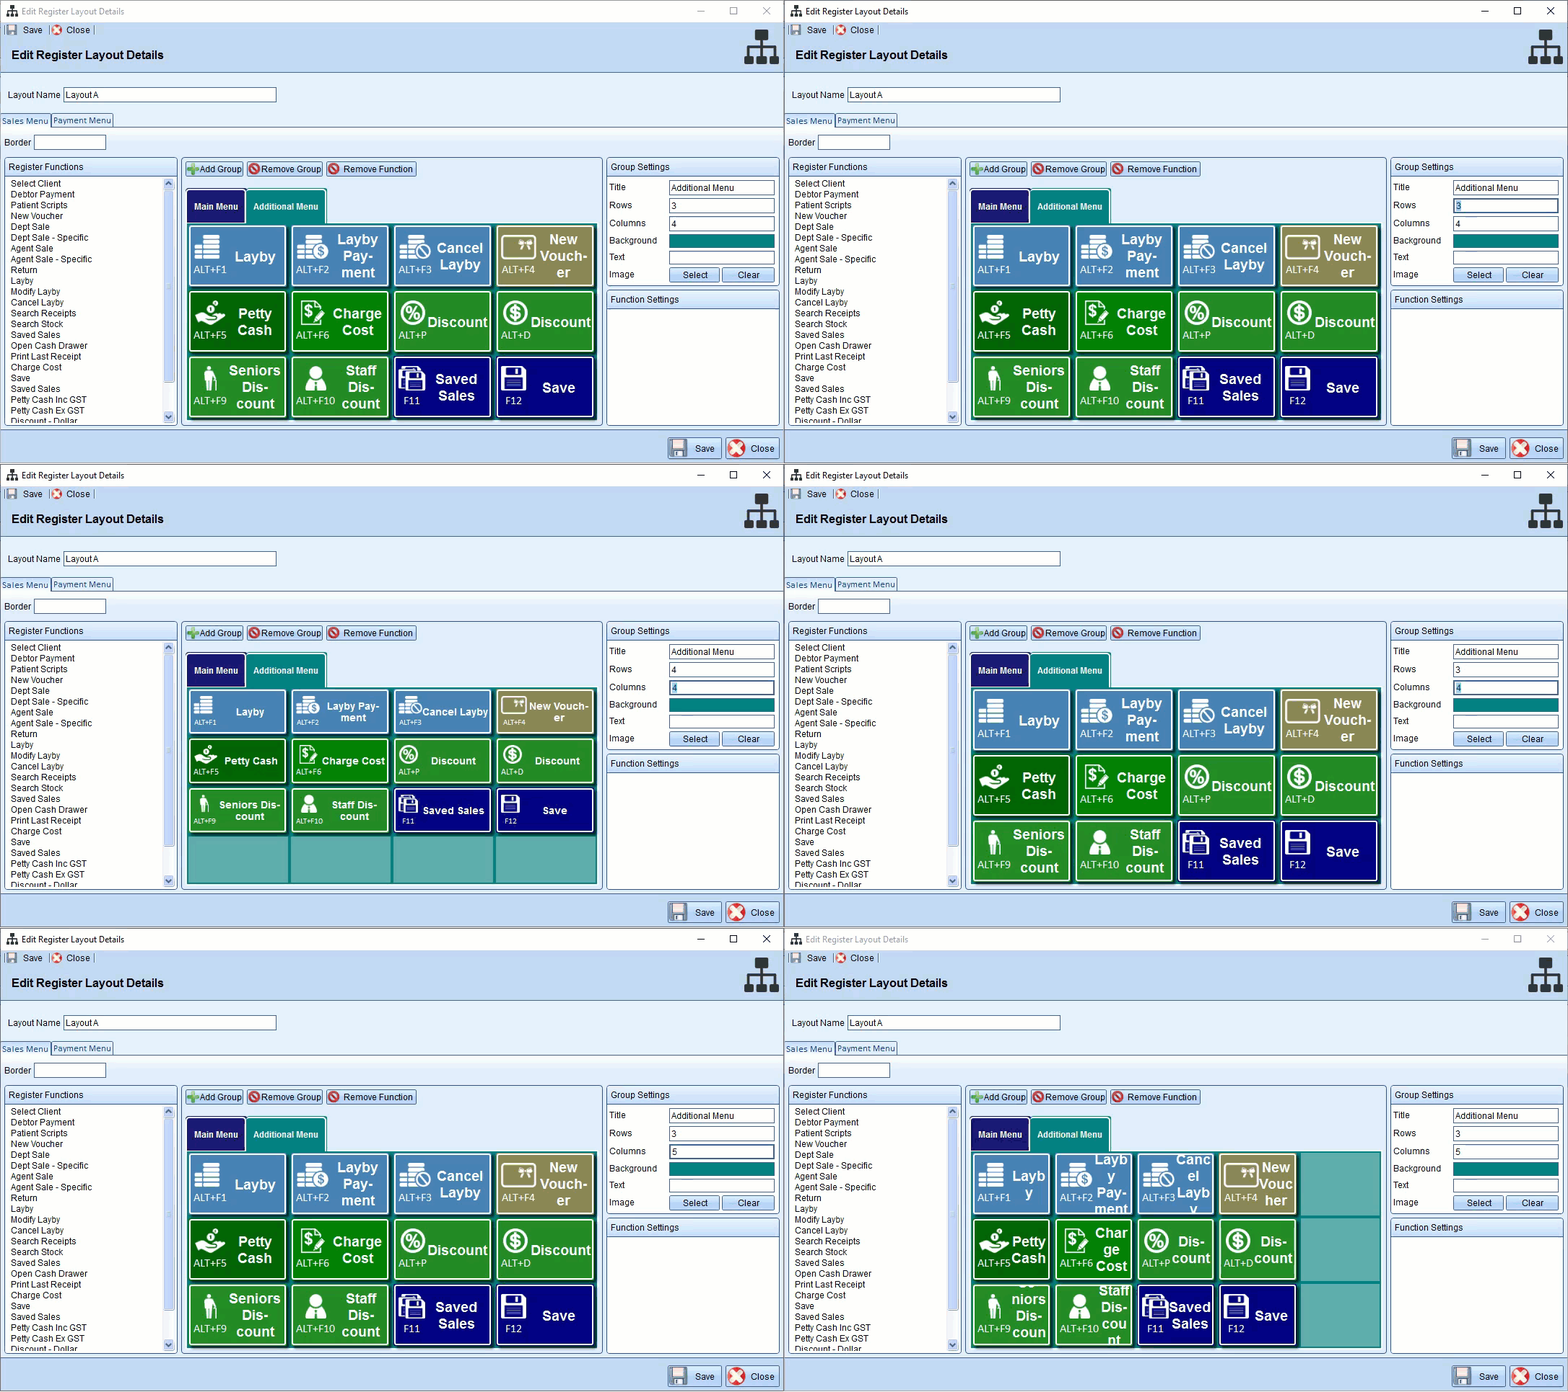
You can modify the amount of rows and columns or a particular group or the "tabs" in Z Register (e.g. in our screenshot, the two groups are: Main Menu, Additional Menu):

To add more space, you'll need to modify the Group Settings on the right panel to either add additional Rows or Columns.
In the example below, we'll be modifying the Additional Menu group settings:
Add New Group/Tab
If you are currently happy with your current layout and don't want to remove or add columns/rows, you can add a new group or "tab" in Z Register. You can do so by clicking on the Add Group button:

In the example below, we're going to be adding a new group called Agencies:
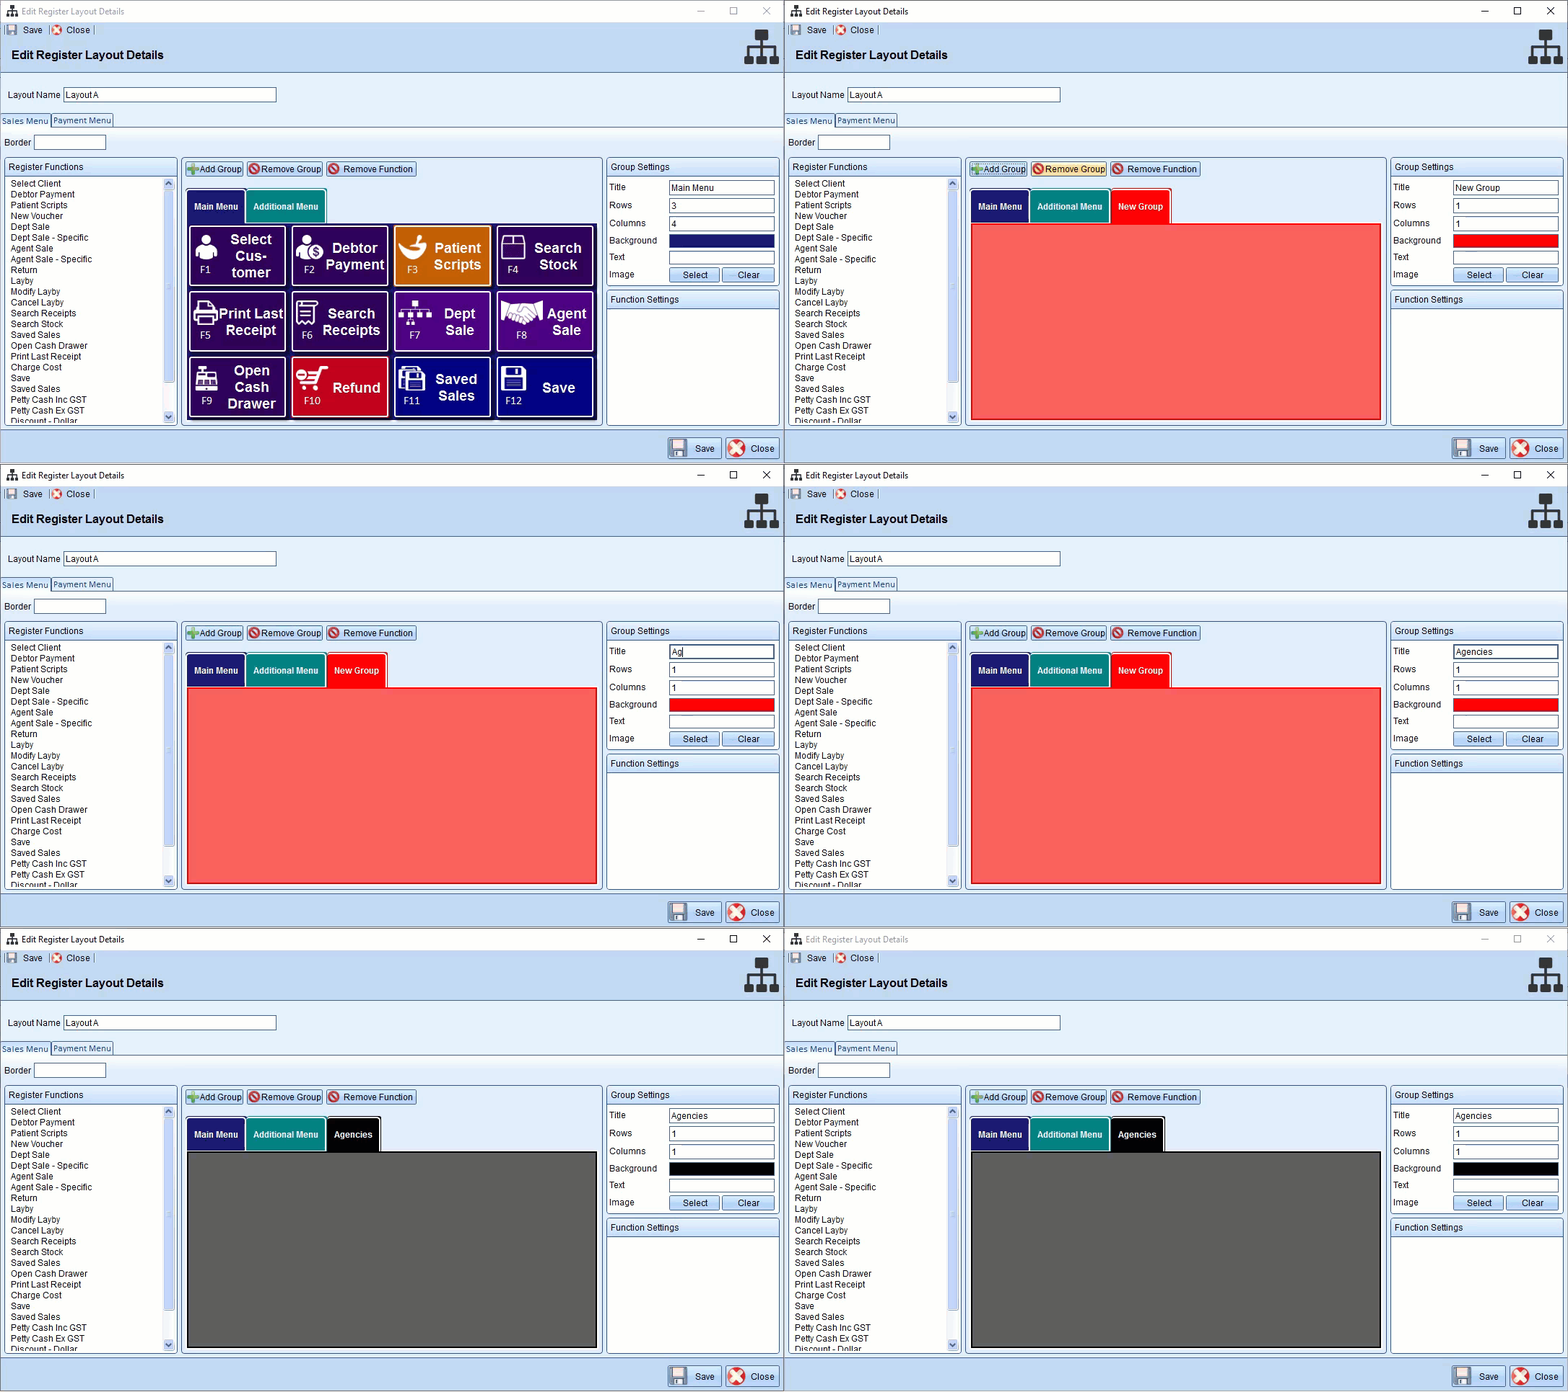
You can change the Title and Background in the Group Settings section.
Add a Register Button
To add a Register button:
- Press and drag the register function into an empty layout area:
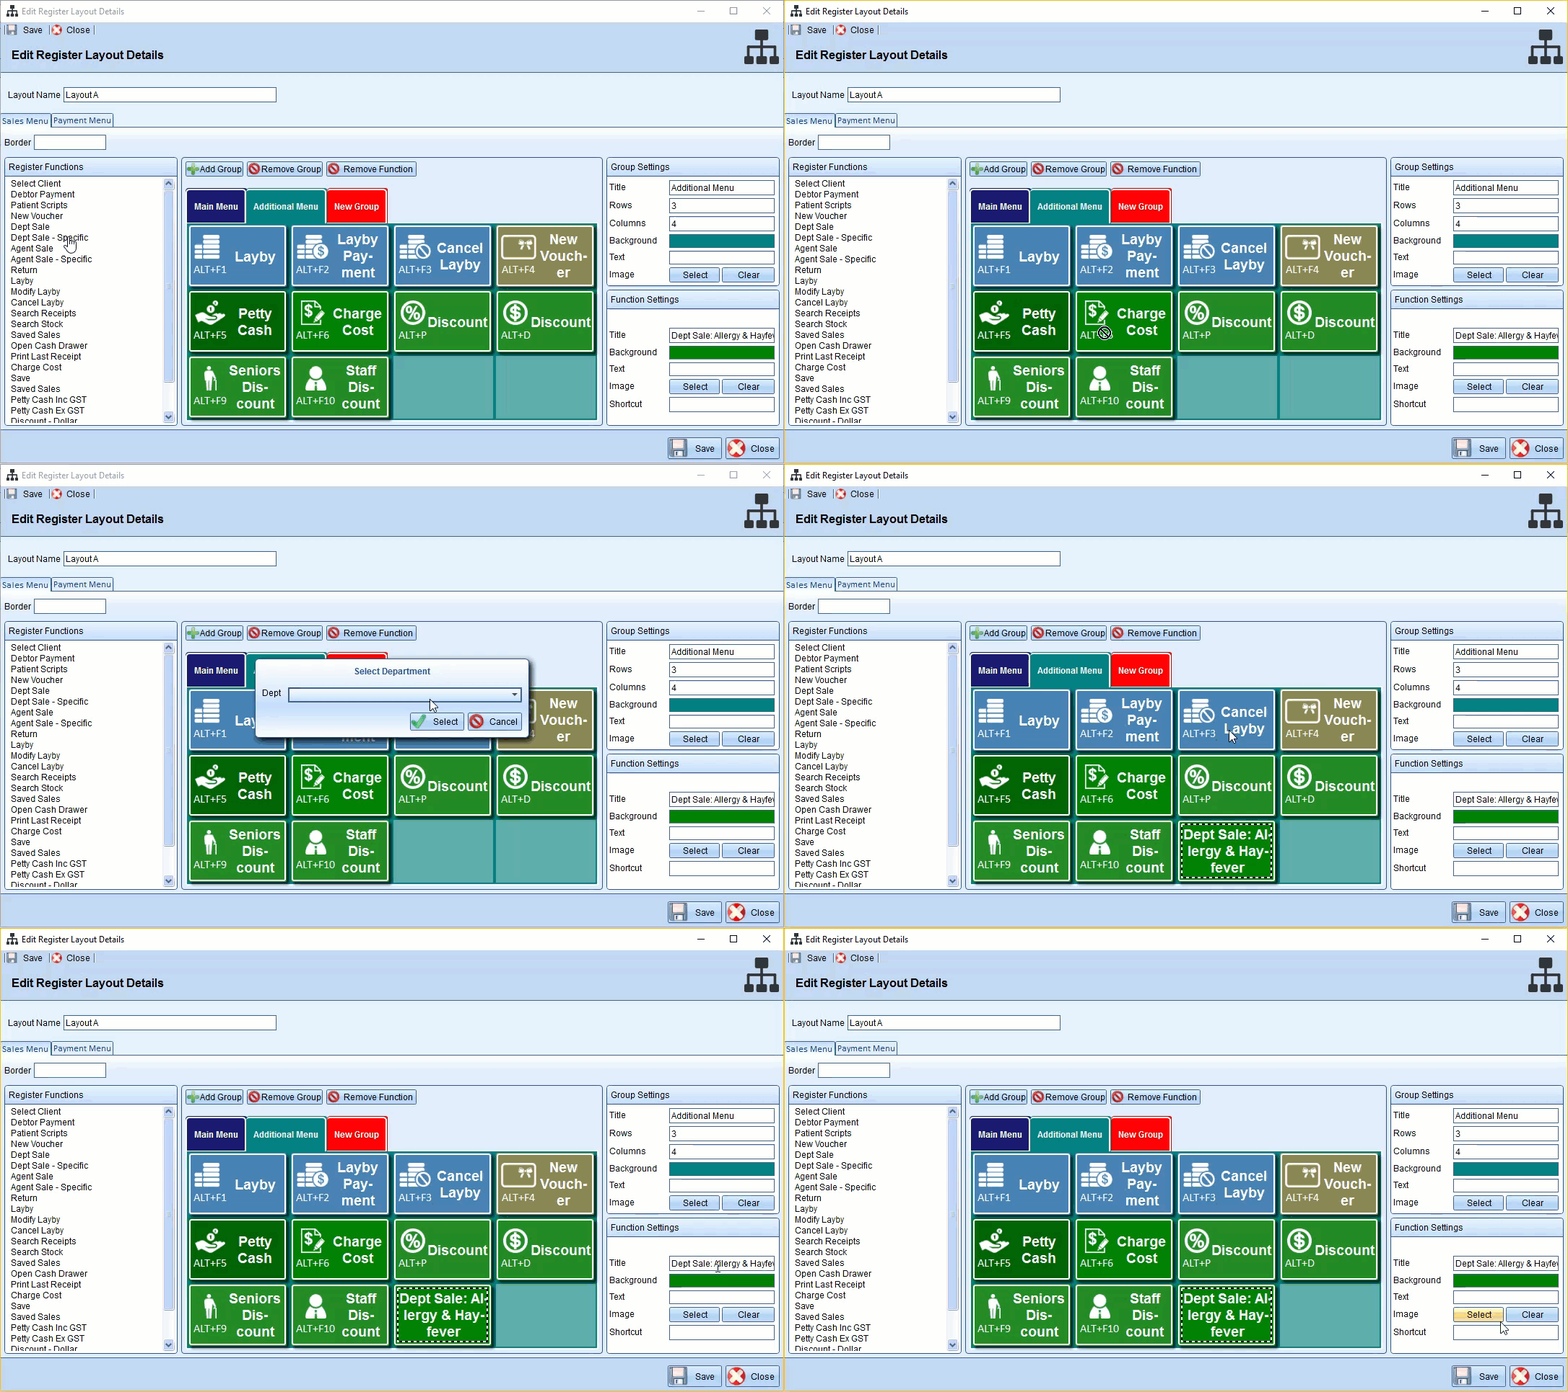
- You can change the Title, Background, Text Colour, Image and also add a Keyboard Shortcut for the function under Function Settings.
Add a Payment Button
Payment buttons can be added to the Payment Menu which you see when finishing a sale in Z Register:
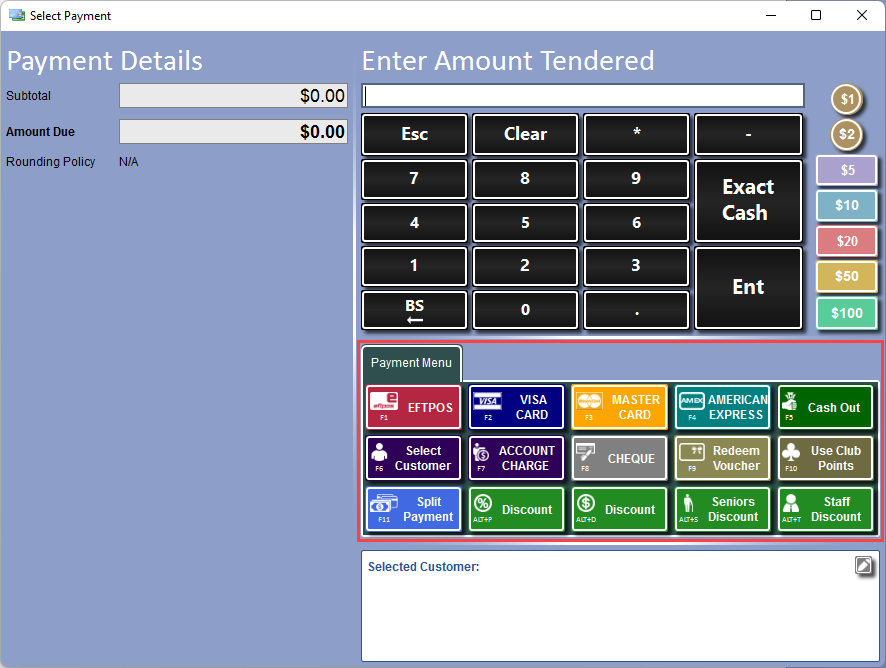
Your payment menu will generally have the standard payment methods like Cash, EFTPOS etc. However, you are also able to add other payment methods and create a button for them in the Payment Menu for use at Z Register.
Before adding a new payment method button to the Payment Menu, you will need to ensure that the payment method exists in Z Office. For a guide on managing and creating a payment method, please refer to Payment Methods.
To add a payment button:
- In the Edit Register Layout, select the Payment Menu tab:

- To add a new payment button you will need to ensure that your Payment Layout has space available to add the new button. Refer to Making Space to Add New Button on how to do this.
- Once you have a spot for the new payment button, drag and drop the Pay Using button under Payment Functions on the left panel:
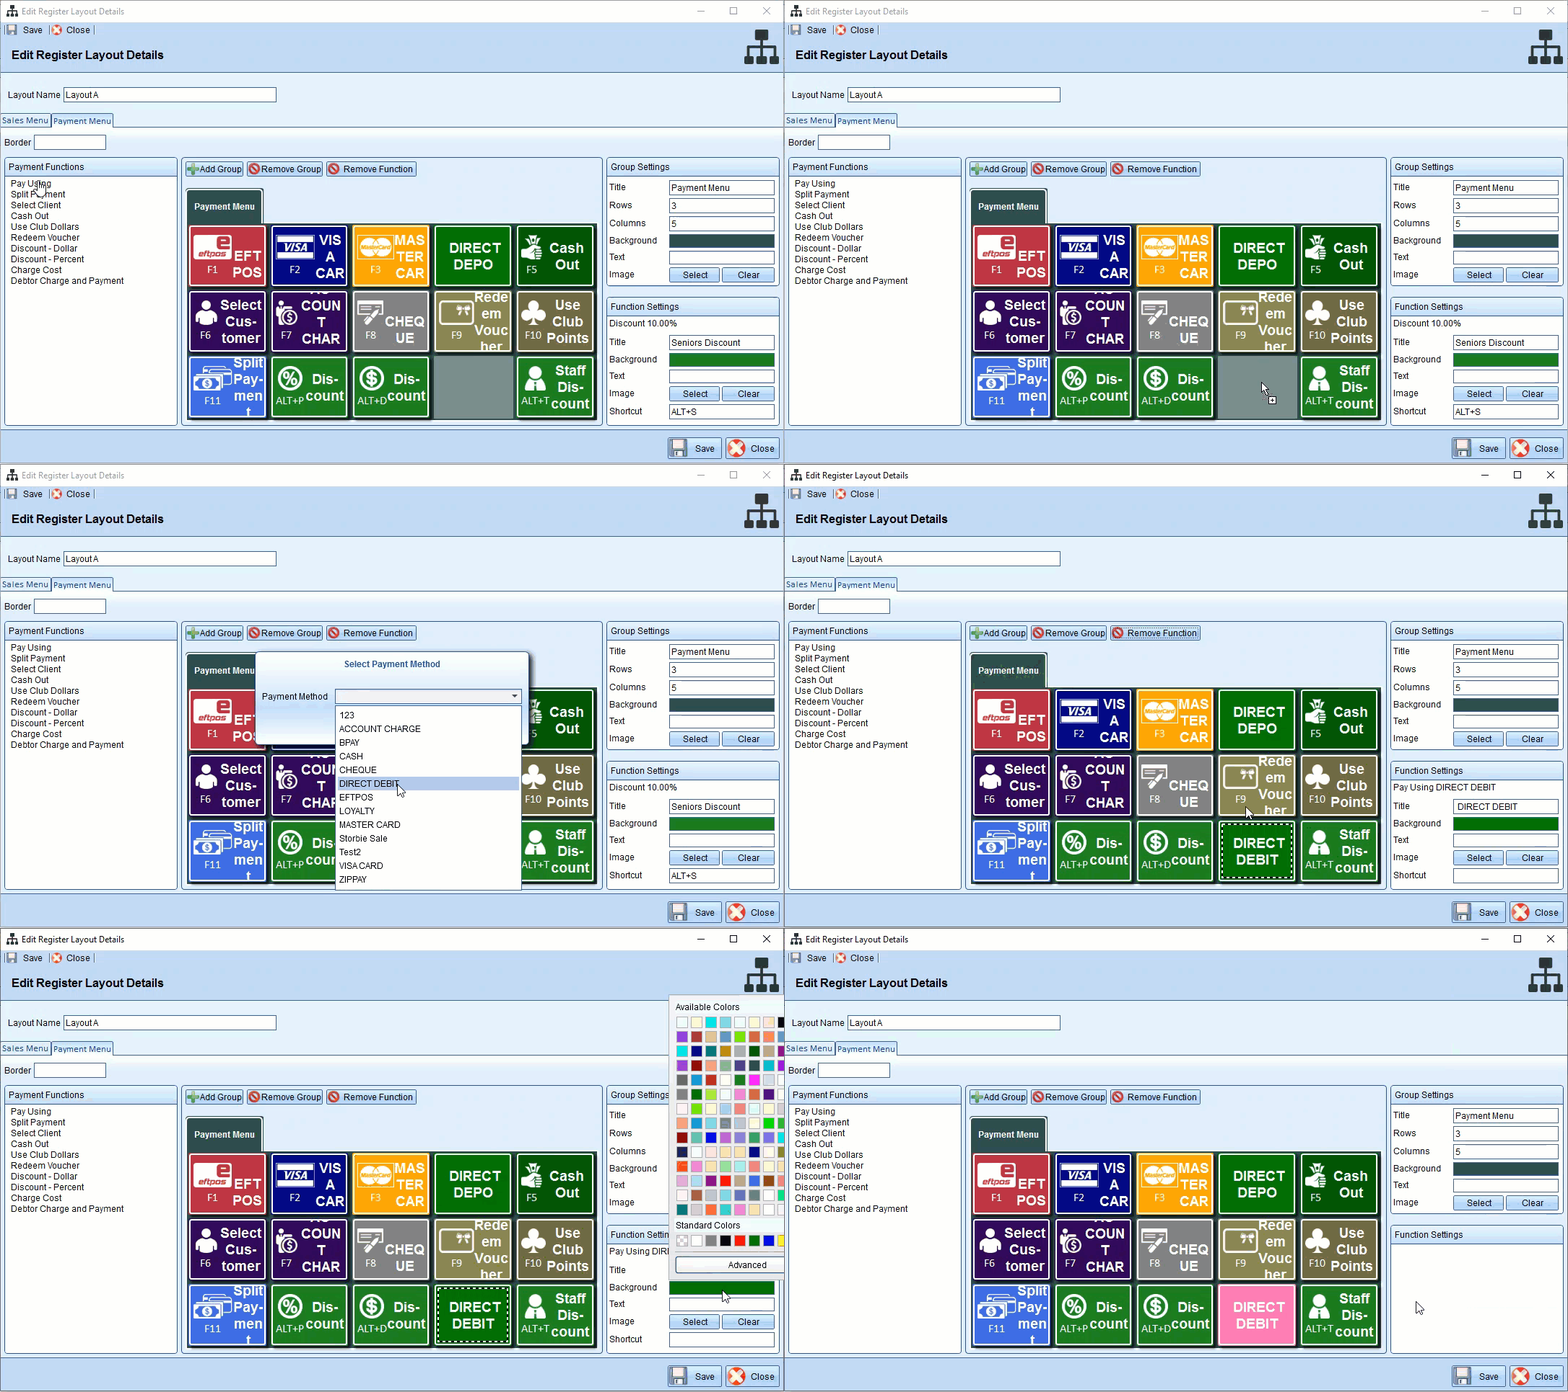
- You can change the Title, Background, Text Colour, Image and also add a Keyboard Shortcut for the function using the Function Settings on the bottom right.
- Once you are happy with the layout, click
 to save the changes.
 - Restart Z Register on all your Till/Register Computers for the layout to update.
Comments
0 comments
Please sign in to leave a comment.