
Please visit Zip for information on the process/fees and to sign up for a business account with them etc.
Test 2
Setting Up Zip
Getting Your Credentials
Please use this guide from ZIP to get your credentials. You will need to get your Instore Key which is your API Key and your Location ID.
Adding Credentials
- Go to Z Office > Settings > Store Settings

- Click on the Integration tab and scroll to the bottom to the Zip section
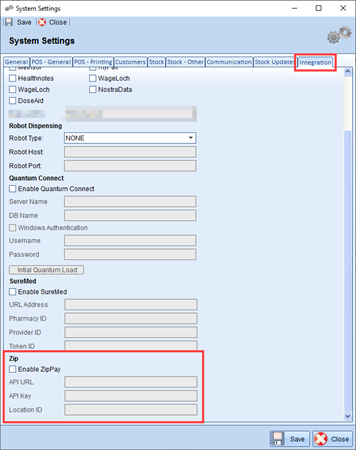
- Tick “Enable ZipPay” and add your API URL, API Key and Location ID that would have been provided by Zip.
API URL: https://merchantapi.zipmoney.com.au/v1
API Key: Please use the Instore Key
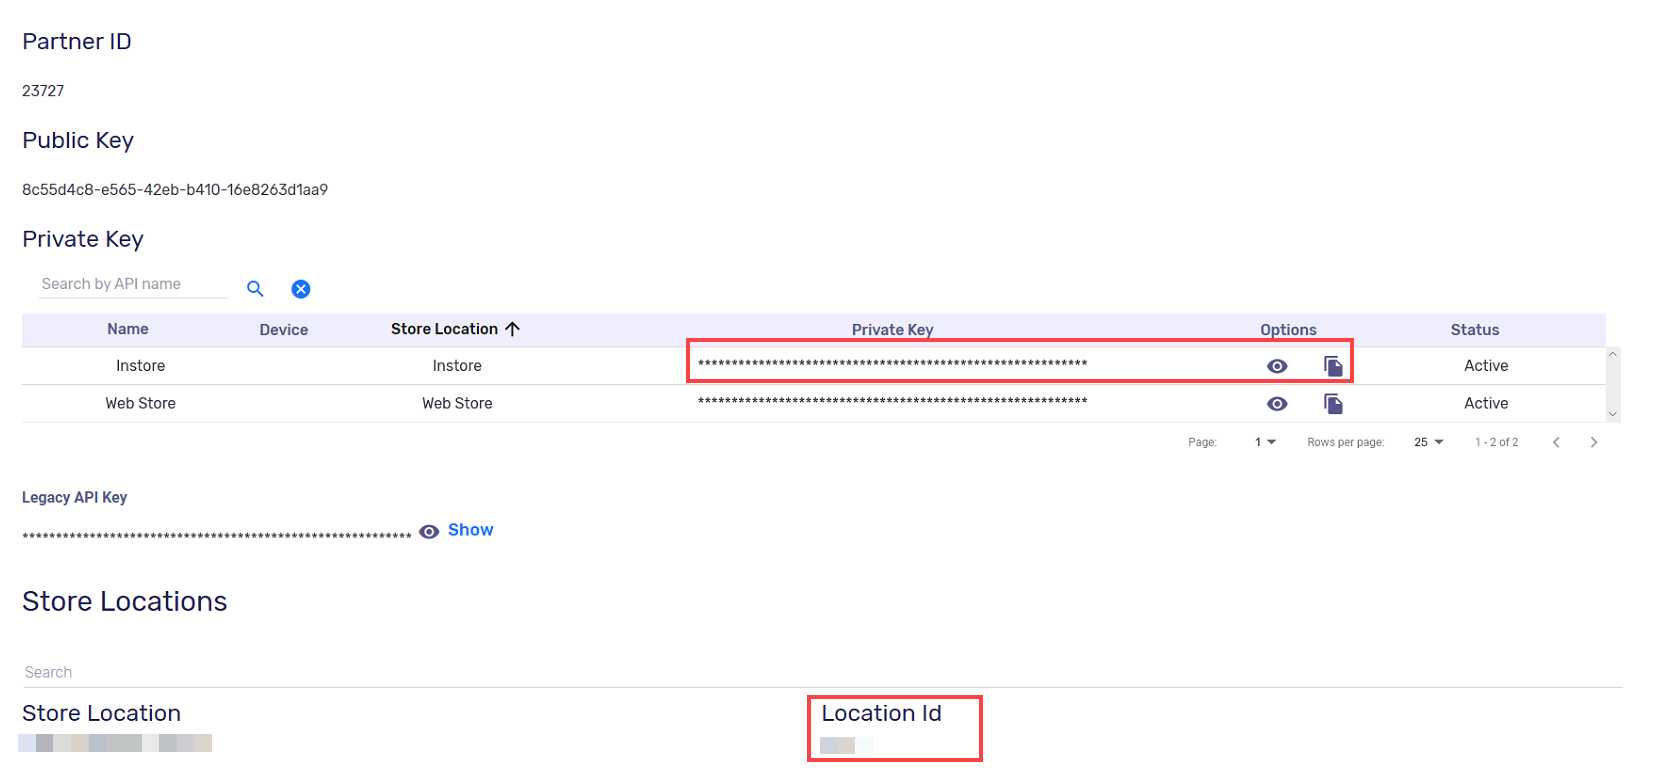
Location ID: This is located under Store Locations if you scroll down. It is NOT the PartnerID - Save
Adding Payment Button in Z Register
- Go to Z Office > POS > Manage Register Layouts
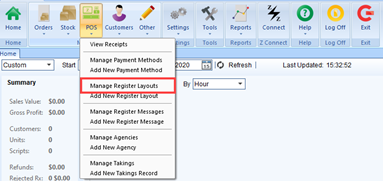
- Select your Register Layout to update
NoteIf you are unsure of which Register Layout you are currently using, you can check on your till computer by going to Z Register > Settings > Register Layout
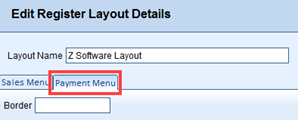
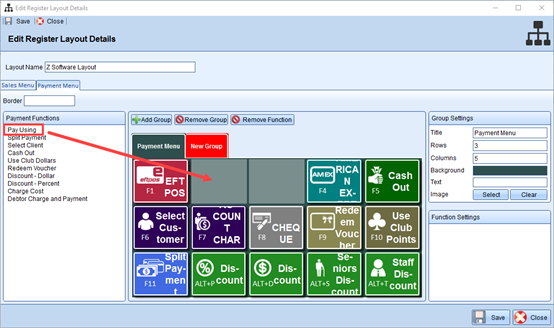
- Click on the Payment Menu tab
- Select the Payment Function “Pay Using” and drag it across to an empty section in the Register Layout:
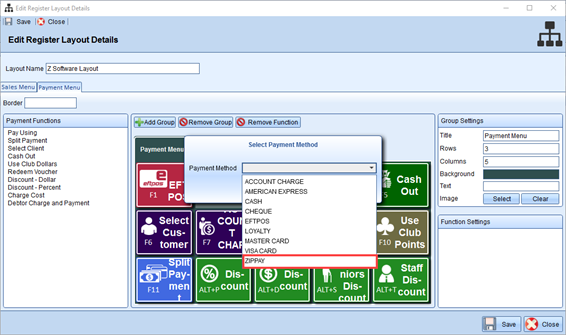
- The Select Payment Method window should appear. In the dropdown menu, select ZIPPAY:
- The ZIPPAY button should appear on the Payment Menu now:
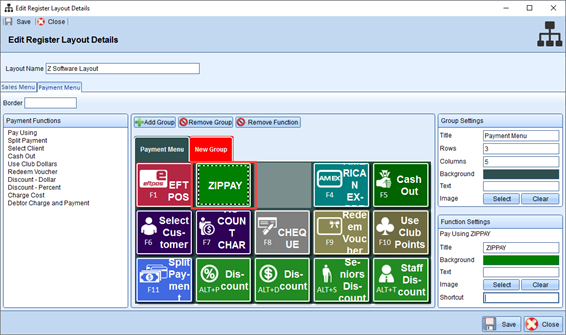
NoteYou can further customize the colour, add the ZIPPAY logo, keyboard shortcut etc. under the Function Settings panel.
- Save
Processing Sales
Full Sale to Zip
- Login to Z Register and proceed as normal to scan or lookup the items to add to the sale
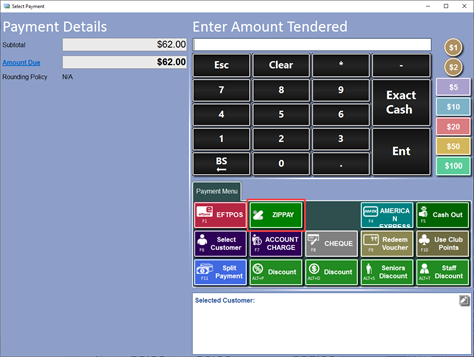
- Once all items have been added to the sale, press ‘Finish’ or the ‘+’ button to enter into the Payment Window
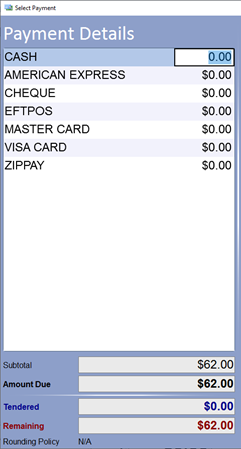
- Select the ZIPPAY payment option
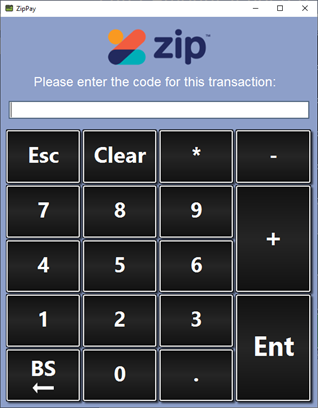
- A new window should appear prompting to enter the Store Code

- Type in the Customer’s Store Code and press Ent or Enter on the keyboard. This should be available on the patient’s Zip app.
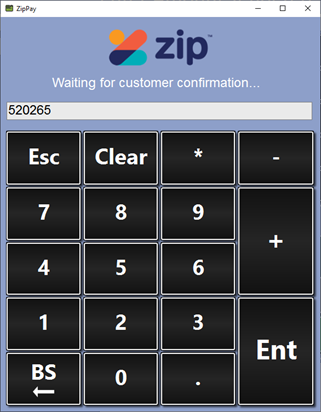
- The system should send the request to Zip. The customer will then need to confirm the transaction on their Zip account:

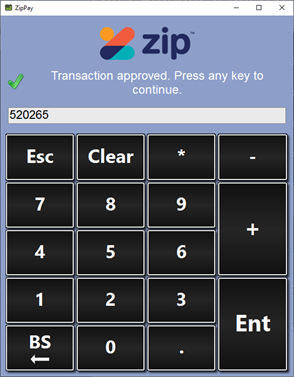
- Once the customer has confirmed the transaction on their Zip account, Z Register will prompt that the transaction has been approved. Press any key to continue and finish the sale

Split Payment with Zip
- Login to Z Register and proceed as normal to scan or lookup the items to add to the sale
- Once all items have been added to the sale, press ‘Finish’ or the ‘+’ button to enter into the Payment Window
- Select the Split Payment Option

- Enter in the payment amounts for each payment method and press Enter to continue with the sale
- A new window should appear prompting to enter the Zip Code. This should be available on the patient’s Zip app.
- Type in the Customer’s Zip Code and press Ent or Enter on the keyboard
- The system should send the request to Zip. The customer will then need to confirm the transaction on their Zip account:
- Once the customer has confirmed the transaction on their Zip account, Z Register will prompt that the transaction has been approved. Press any key to continue to process the sale for the rest of the payment methods.
Processing Refunds
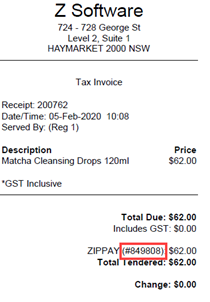
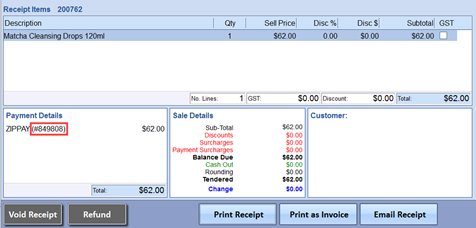
You will need the Zip Transaction ID to process manual refunds via Zip. You can find this either on the receipt or in the Search Receipts window in Z Register. Alternatively, the customer should be able to locate the Zip Transaction ID in their Zip account as well.
Manually
- Login to Z Register
- Press the Refund button and scan the item they wish to refund
- Once all items have been added to Refund, press ‘Finish’ or the ‘+’ button to enter into the Payment Window
- Select the ZIPPAY payment option:

- A new window should appear prompting to enter the Zip Receipt Number (Zip Transaction ID) to refund:
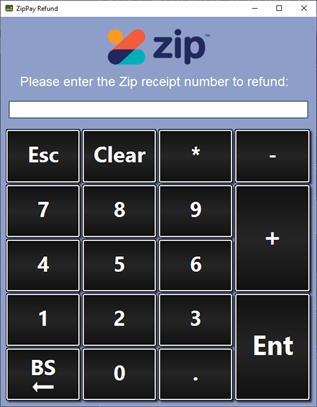
- Type in the ZIP Receipt Number and press Ent or Enter on the keyboard
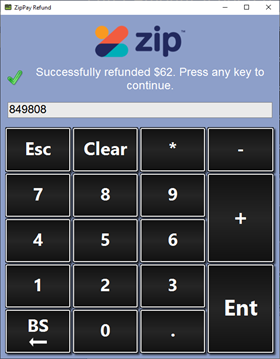
- Z Register will send the transaction to Zip then prompt that the transaction has been approved. Press any key to continue
Refund by Receipt
- Login to Z Register
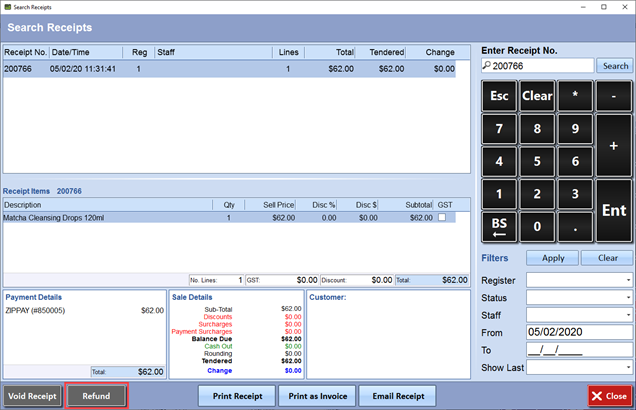
- Select ‘Search Receipts’ to bring up the Search Receipt window
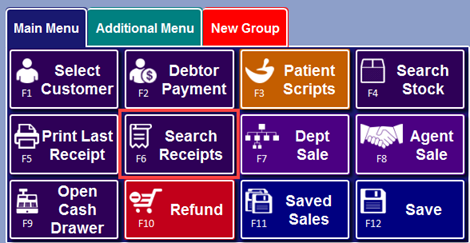
- Select the receipt you wish to process the refund for and press Refund
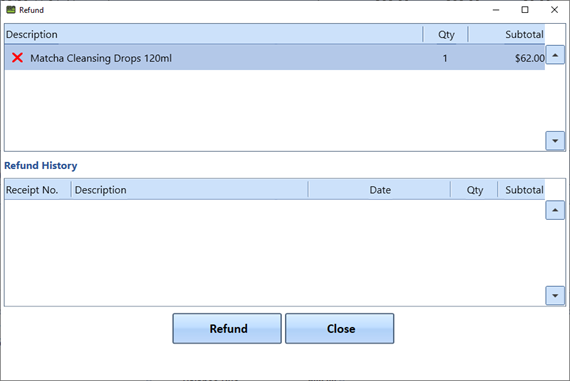
- The refund window should appear. Select the items and press Refund
- Once all items have been added to Refund, press ‘Finish’ or the ‘+’ button to enter into the Payment Window
- Select the ZIPPAY payment option

- A new window should appear. The Zip Receipt Number (Zip Transaction ID) will be prefilled.
Please check the number against the receipt/with the customer before pressing Ent or Enter on the keyboard to continue.
- Z Register will send the transaction to Zip then prompt that the transaction has been approved. Press any key to continue.
Comments
0 comments
Please sign in to leave a comment.