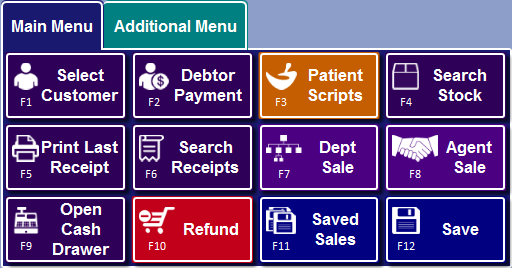
Z Office gives you the ability to modify Z Register Layouts to add/remove buttons and functions and also change the colours etc.
Add New Register Layout
Note
Generally, we recommend using the default register layouts (indicated with a  ) as a starting point, as it makes it easier to customise than starting from scratch.
Follow the Manage Register Layout guide for more information.
- Go to Z Office > POS > Add New Register Layout
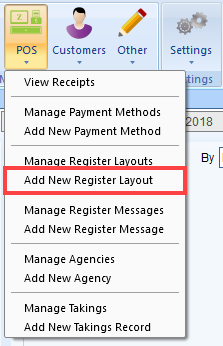
- The Add Register Layout Details window should appear:
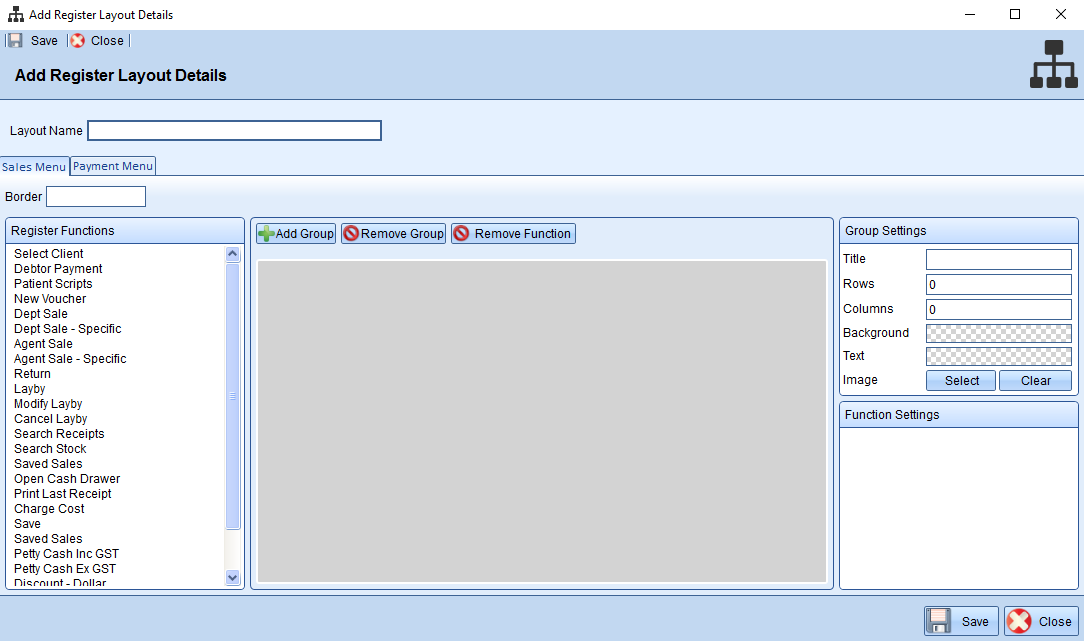
For more information on how to use this window, scroll below to the Manage Register Layout section.
Manage Register Layout
- Go to Z Office > POS > Manage Register Layouts
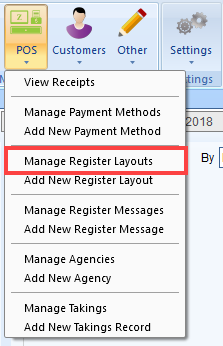
- Select a Register Layout to update
NoteYou can't update system default layouts which are indicated with a
 . You can however, use them as a starting point and save the Layout Name as something different.
 - The Edit Register Layout should appear:
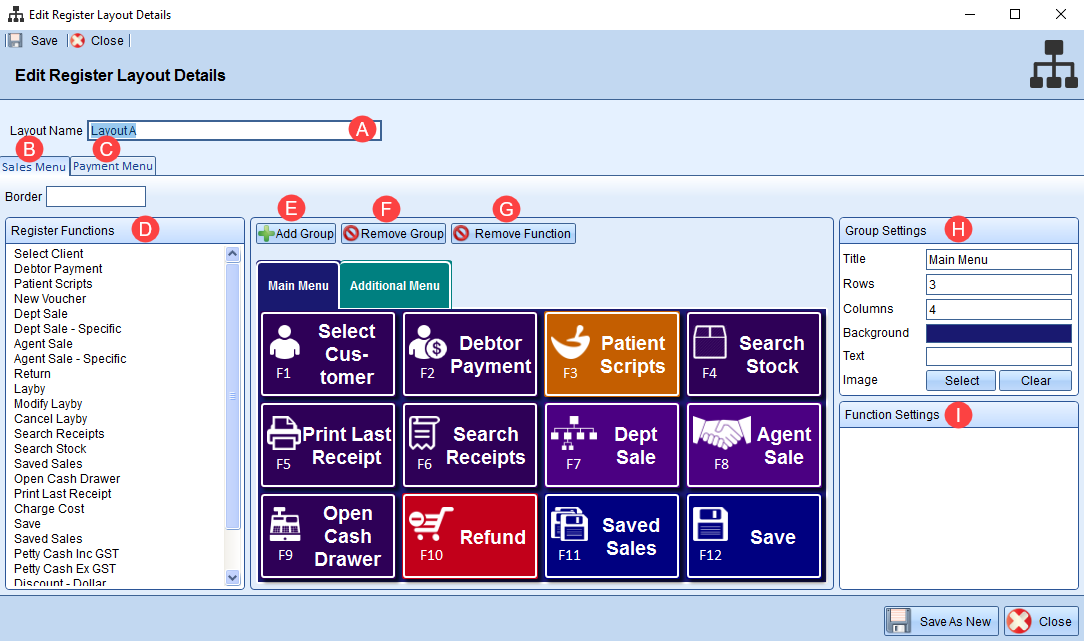
a. Layout Name - The name of the layout
b. Sales Menu Tab - The layout settings for the Sales Menu
c. Payment Menu Tab - The layout settings for the Payment Menu
d. Register Functions - The list of available register functions
e. Add Group - Add a new group/tab to the menu
f. Remove Group - Remove a group
g. Remove Function - Remove a function button from the layout
h. Group Settings - Modify the group settings - in particular the grid (amount of columns and rows)
i. Function Settings - Function settings
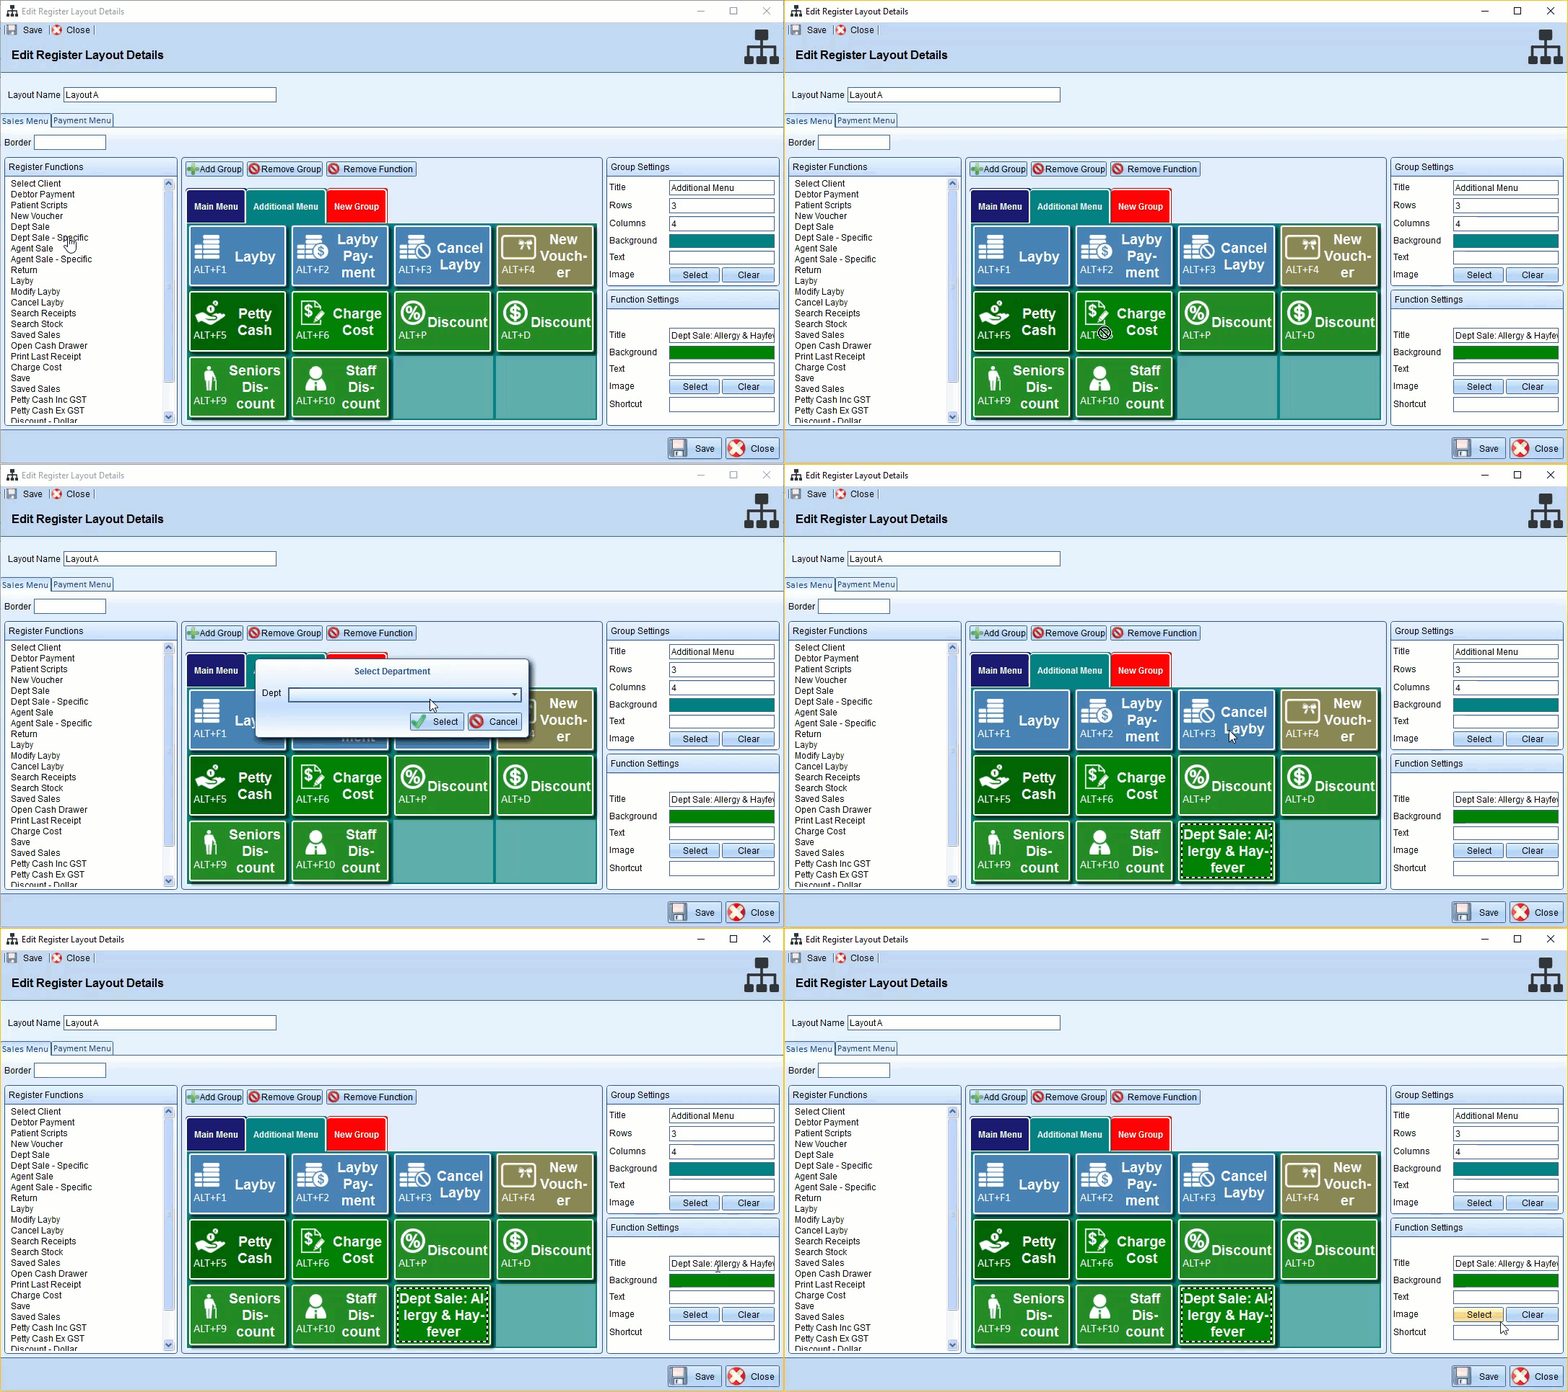
Add a Register Button
- Press and drag the register function into an empty layout area
- You can change the Title, Background, Text Colour, Image and also add a Keyboard Shortcut for the function.
Comments
0 comments
Please sign in to leave a comment.