The Z Register program is used to process sales. This guide aims to cover the basics of the Z Register program. Please note that register layouts can be changed so your screen, buttons and hotkeys may be different.
To open Z Register
Once you login, you'll be met with our login screen. Please visit our Z Register page for more detailed information on the available features and settings.
- Double-click the Z Register icon
 on the desktop
To process a sale
Please visit our Z Help Portal Sales and Payment page for more detailed guides on how to process sales.
- Go to Z Register
- Ensure that you have a staff ID and if required, password set up in Z Office. Input these in and press ENTER to login

- Once logged in, your staff name should appear on the right top panel:

- Select the items to enter into the sale via the top left bar by either:
Scanning the barcode of the product
OR
Typing in the PDE
OR
Searching the name of the product
- Once all the items have been added into the sale, press
 or the ' + ' key on the keyboard to bring up the payment window
 - For Cash Transactions:
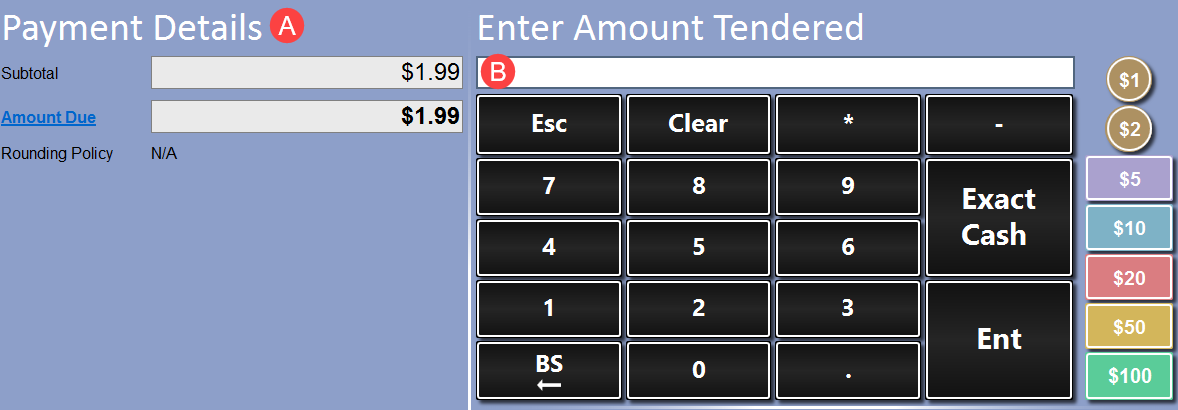
a. Payment Details - This panel will show you the subtotal/amount due of the sale
b. Enter Amount Tendered - Enter the amount tendered in this screen through either:
TYPE in the value in the field using your keyboard
OR
Use the onscreen number keyboard to enter in the value
OR
Use the onscreen cash buttons to tender that amount (e.g. $1, $2, $5 etc)
NoteIf the exact amount in cash is given, press Exact Cash to complete sale OR the ' + ' key on the keyboard to complete the sale without the need to enter the amount tendered
- The Finish Sale window prompt should appear:
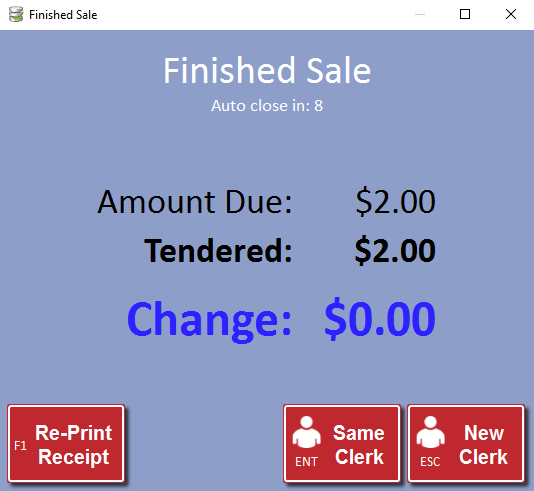
Re-Print Receipt (F1) - Press this to Re-Print the Receipt
Same Clerk (ENTER) - Continue the next sale with the same staff member
New Clerk (ESC) - Continue the next sale with a new staff member (requires new login)
To add scripts to a sale
- Press
 or F3 (Default) on the keyboard to print up the Select Script window:
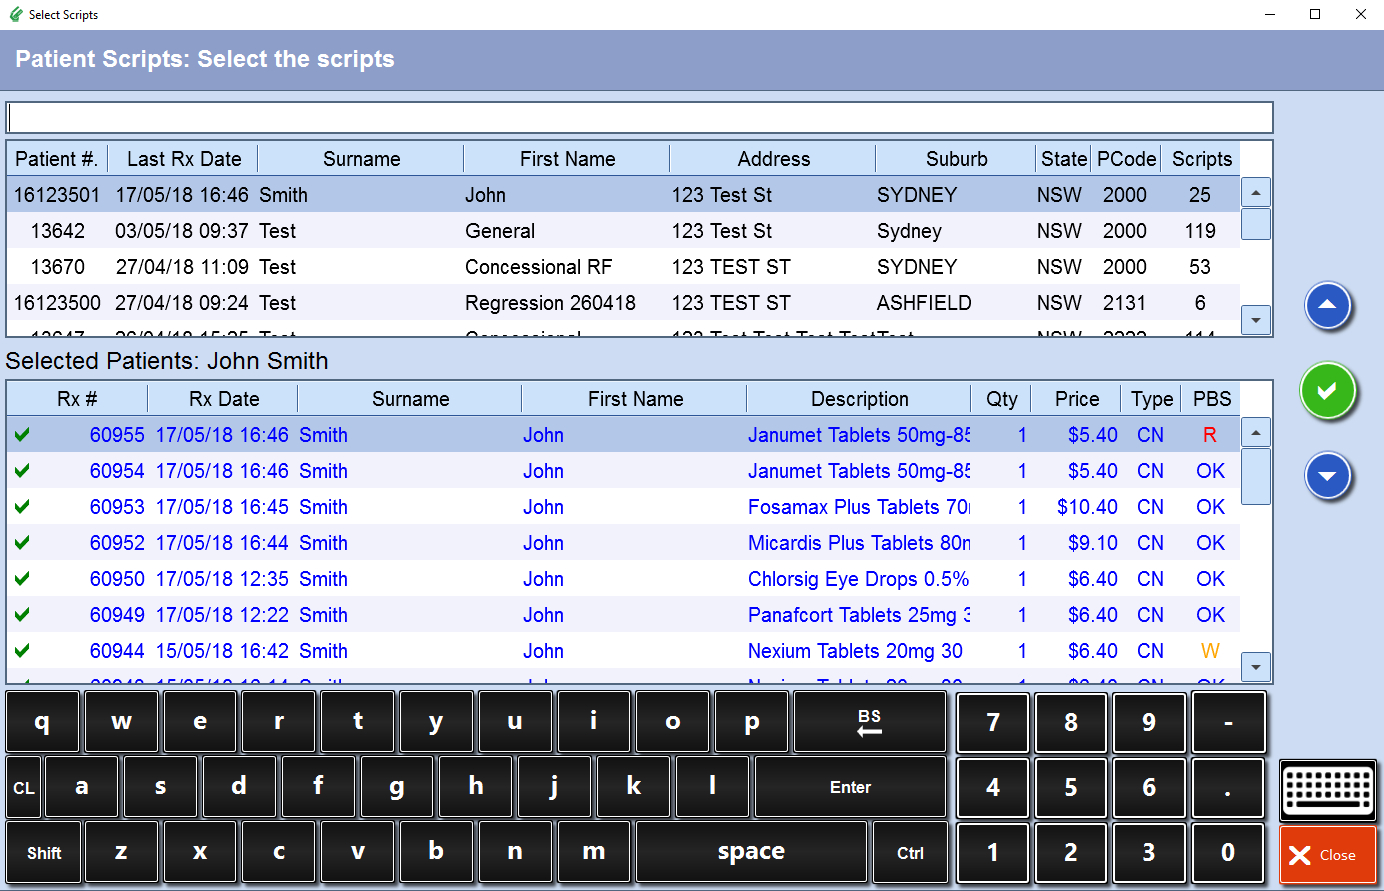
- Search for the patient or go down the list to find the patient(s)
- Select the required patient to highlight them and view the list of scripts they have waiting at the till.
By default, all their scripts will be marked to indicate that they have been selected to add to the sale.
To deselect a script to add to the sale, select the medication and the system should mark them with a
- Press on the green tick
 or enter on the keyboard once ready to add the prescriptions to the sale.
To process a refund
- Log in to Z Register
- Press Refund or 'F10' key on the keyboard

The item selection field should now have 'Refund' in front of it to indicate that items scanned will be refunded.
- Scan or select the product into the refund
- The refunded item will appear red to indicate it's going to be refunded:

- Finish the sale with the desired payment method
To zero a till
- Go to Z Register > Till Report

- The Login Required prompt should appear:
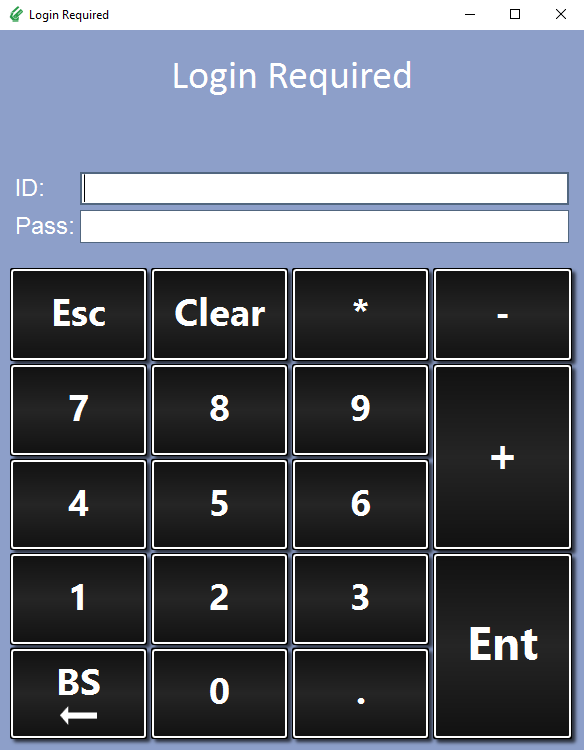
Log in with your Z Register ID and password (if required). - The Current Period Till Report should appear:
- Press
 or
or  to zero the till
 - The confirmation prompt should appear:

Press Yes to continue. - Once ALL the tills have been zeroed in the till period, you should get this prompt as well:
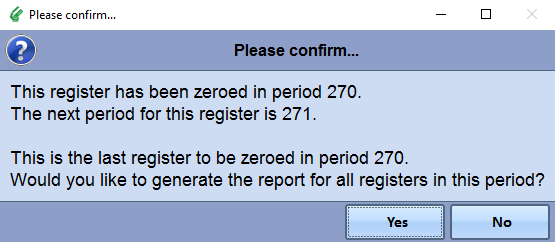
Press Yes to print a combined report of all the tills zeroed.
Comments
0 comments
Please sign in to leave a comment.